Friday, July 8, 2011

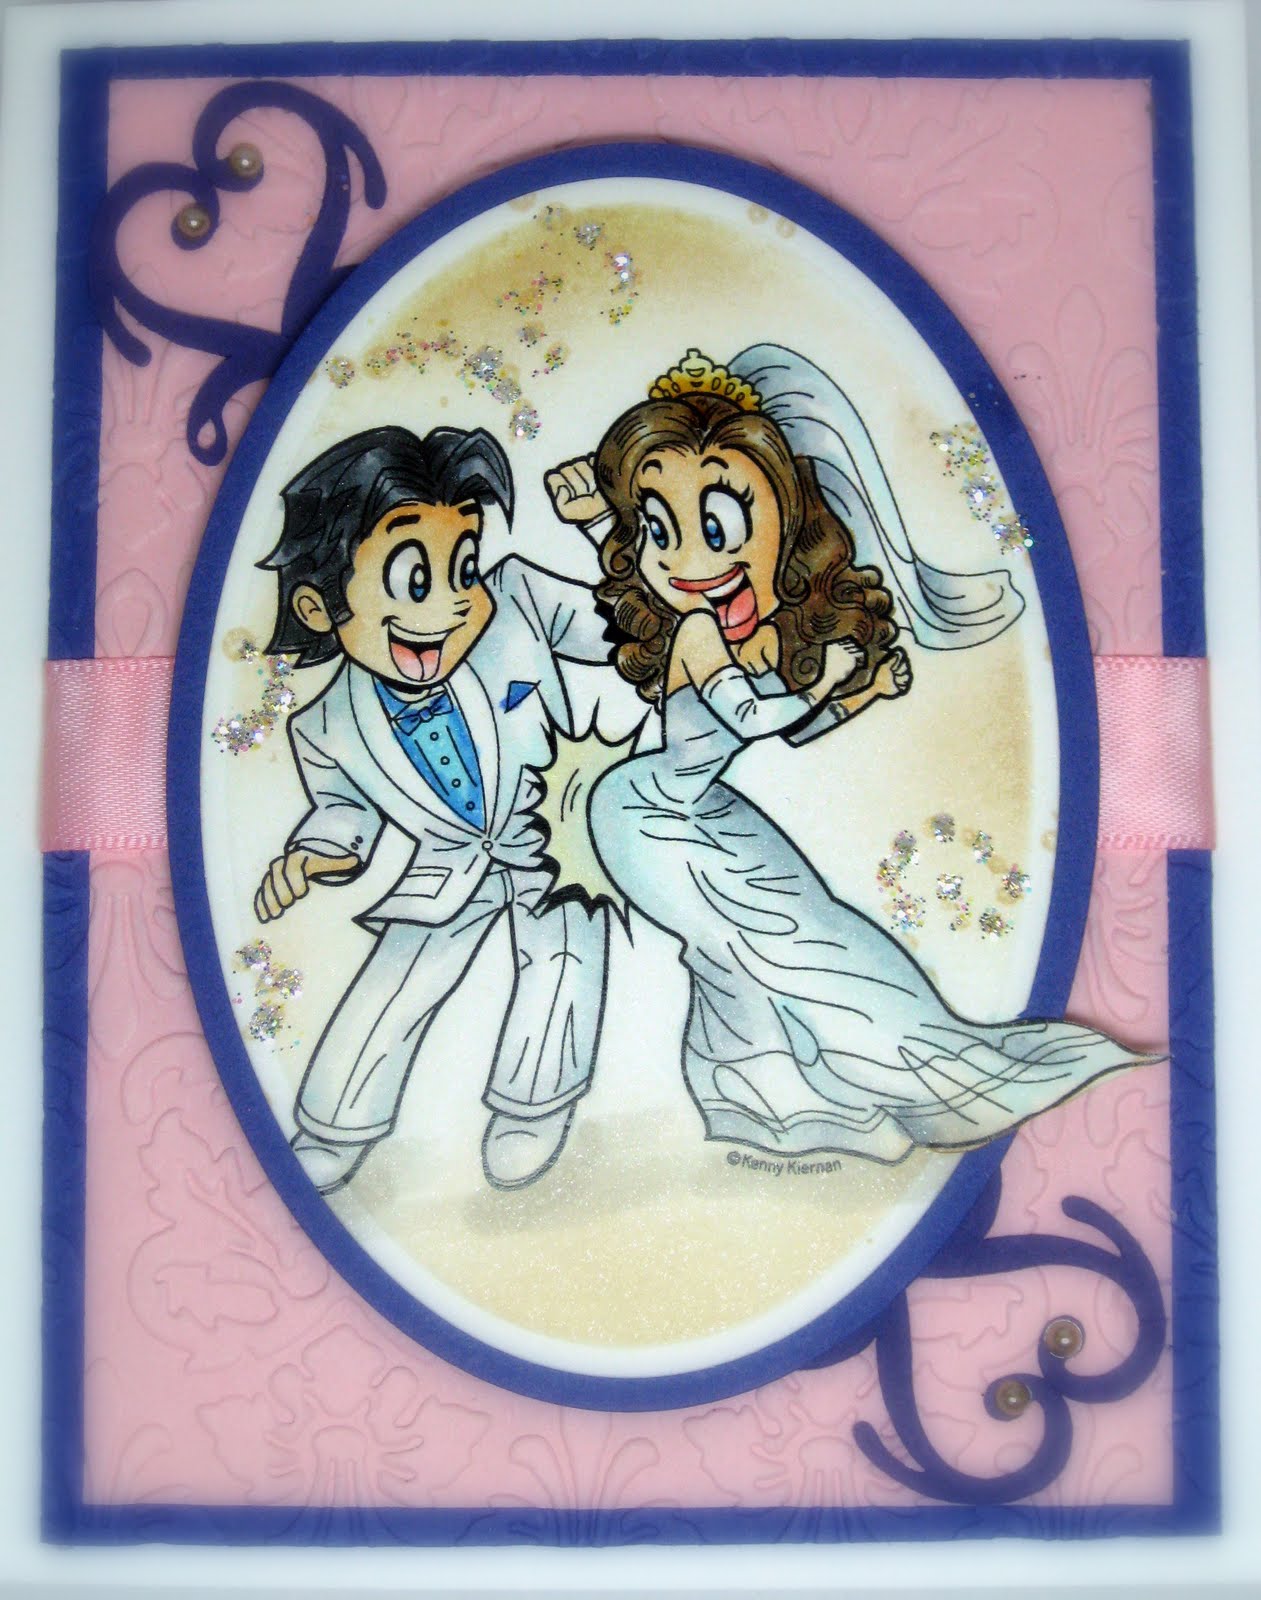
Bam!!! Wedding Dance


 Happy Friday to all my wonderful cyber friends!   I have a day off and yet bet.... I am spending as much time as I can in my craft room!
There are two wonderful challenges I am participating in today.   
 
Copic Creations   The challenge for Copic Creations is to use you Copic markers to create "white" clothing.    The wonderful sponsor and prize for one lucky winner will be:

What’s the prize this week??!

A $25.00 GIFT CERTIFICATE TO LA LA LAND CRAFTS!!!!

Woooooooo Hoooooooooo!

The challenge for Top Tip Tuesday is to create a "wedding" card or and "anniversary" card. This site is just wonderful.  If you haven't had a chance to stop by yet, you will be in for a surprise!  They offer "tips" and who couldn't use tips on new and easier techniques!  The    is the wonderful sponsor and the  winner will receive  2 digi's from: 


and Glitterbabe - is offering our Featured Tipper 2 images of their choice from her shop,

What fantastic sponsors!!!
 The card I made for these challenges is from Kenny K's Digital image called "Wedding Dance".

 Click image to enlarge
Technique:
  • Coloring White with Copic Markers
  • On Paper Blending Technique


Measurements:
Card Base 5.5 in. X 8.5 in.
Score and fold  at  4.25 in.  (This makes card for a 2A envelope)
Base Layers  4 in. X 5.25 in. and 3.75 in. X 5 in
Focal Image Layer  Large Petite Spellbinder Nestabilities
Base Focal Image Layer Large Petite Oval Spellbinder Nestabilities

Supplies:
Focal Image:  Kenny K  Digital Image:   “Wedding Dance”
            GKD: Melanie Muenchinger “Bring the Bling”

Copic Markers:
            Face:  E000, E00, E01, E11 touch of  R20
            White Clothing:  C1, C0, C3,  B10
            Groom’s Shirt:  BG05, BG00,BG0000
            Groom’s Hair:  C3, C5, C7, C9
            Bride’s Hair:  E49, 47, E44, E41

Card Stock Cryogen White,  GKD Pure  White, Bubblegum Pink and Bazzill Smoothies Boysenberry

Ink : Memento Black and Desert Sand

Tools: Scor-Pal or Scor-Buddy, Paper Cutter (I use Fiskars), Scissors  (Tim Holtz helps reduce pain for those with arthritis!), Quickie Glue Pen, Adhesive,large sponge daubers, Spellbinders Nestabilities  Large Oval Die, Cuttlebug and Kassie’s Brocade embossing folder, Criicut Die Cutter .

Embellishment:  Stickles, Pearls, Flourishes from Cindy Loo Cricut Cartridge

Tip of the Day.  Save mega bucks by using you Cricut cartridges for flourishes.  I spent $25.95 for one flourish die and decided I would pull out my Cricut and find flourishes on my old carts that work!  I used Cindy Loo Cricut Cart for my flourishes and made them look like hearts.  I discovered that just about every page of the Cindy Loo Cart has flourishes!  Great discovery!

Click image to enlarge

 I stamped the background of the focal image with "Bring the Bling" with a vry light ink by Memento called "Desert Sand" and then used Stickles on the spiral design.  I then used my Cuttleug to emboss the base card layer.   I used Cindy Loo Cricut Cart for my flourishes.  I put them together to form a heart and added pearls. 

I hope you have a fabulous day and weekend.  Thank you for stopping by.  Come back soon.  I will post the new Color Me Creative Challenge  Sunday.

Hugs,
Marie

Tuesday, July 5, 2011

A Big Fish Story

The purpose of  Teapot Tuesday's Challenge 153  is to create a card, inspired by the  story that our "mudder"   has provided for us.  It is a Sisterhood of the Traveling Teaparty!   To understand the inspiration story, you must check it out at our challenge for Teapot Tuesday  because  the mad tea party is still going!


This is my card and story for this challenge:


This is a fish tale  so listen carefully.  

 You may have not known that Golfsalot has a brother called Twosportsinone.  You see, he has a very long name too, just like his brother!   He is a very busy but wants to make sure he get’s his time for sporting into his schedule.  He is also a bery brilliant man so  so in keeping with his name, he tries to multitask and usually tries to do two sports in one.   Hence, the story…

Twosportsinone
 wanted to have some fun.

Fishing was his game,
but his golfing was very lame.

But  much to his surprise,
And right before his eyes,

He saw what he had done…
He scored a “hole in one”!


Technique: 
Copic markers
On paper Copic ink  blending
Sponging  
Paper Piecing          


Measurements:
Card Base 5.5 in. X 8.5 in.
Score and fold  at  4.25 in.  (This makes card for a 2A envelope)
Card Base Layer  4in X   5.25 in..
Focal  Image Layer   3.75in X 4.75in.
Focal Layer 3.5 in. X 4.in.

Supplies:
Focal Image:  GKD / Theresa Momber  “Gone Fishing”

Copic Markers:
Dock:   E47, 3E45, E35, E31, E41, E49
Water and Sky::  BG0000, BG00, BG32, BG34, B0000, B00, B02, (Sky is a combination of Copic markers and sponging)
Fish:  C0, C1, C3, R20, YG 99 using tip to tip with Y0000
Ground ,Trees and Catails:  W1,  G27, G40 YG 63, E49, E44, E 42, (Tree Sillouette in water  C0)
Golf Ball C0
                                                                                                                           
Card stock :  : Cryogen White for focal image,  GKD Pure Luxury White for Card Base, , Pure Luxury Chocolate Kiss and Fresh Asparagus

Ink : Memento  Tuxedo Black, Summer Sky, Paris Dusk, Angel Pink,

Tools: Scor-Pal or Scor-Buddy, Paper Cutter (I use Fiskars), Scissors  (Tim HoltzTonic scissors are great for people with arthritis and painful joints . stamping block, Cuttlebug, Distressed Stripes embossing folder and  sponge Daubers.


Tip of the Day:  You can make shadows in the water, such as  trees, by turning the tree stamp upside down, masking the trees and stamping the upper part of the stamp over the water.  It works well to use a very light shade of grey and then stamp off the paper first to make it even lighter before stamping the water
Thank you for taking the time to look at my card and jump in and play along!

Hugs,
Marie

Friday, July 1, 2011

Tiny Teacher Toby Turtle

I was invited to join a new forum called "Teapot Tuesday".  No invite is necessary by the way- anyone can join through Splitcoast Stampers.   I decided to see what this was all about.  It is a bit of a stretch but I thought... why not!  Well after viewing a few cards and reading their stories  I had to pick myself up off the floor  while still laughing and dust myself off! (That alone says something about my housekeeping)!
So what is Teapot Tuesday all about?  You can read all about it  HERE.
This is what  this fun site is all about.
  • Anyone is welcome to play! You automatically become a Teapotter the first time you play in our challenge.
  • You can write a little story to go along with your card.  You do not have to write a story. You just have to be inspired by the  picture  of the week and/or by the story,
  • Have fun!
  • this is your first Teapot Tuesday Challenge, please mention that in your commentary so we can be sure to greet you properly, in pure Teapot Tuesday fashion!
  • Every last Tuesday of the month is Tickle A Teapotter Week! You can choose to send your card to a selected "destination" if you desire.  Your participation in Destination Station is 100% voluntary and not at all required. Just have fun! 
Well ..... this is my first go at it....  The challenge for this week is:

WELCOME TO TEAPOT TUESDAY
THE SISTERHOOD OF THE TRAVELING TEAPARTY
AND CHALLENGE #152


Back to School, Back to School
To learn to count would be so cool!


Back to School, Back to School!
To prove that we are not a fool!


Back to School, Back to School!
I'm sure there's not a single rule!


Tiny Teacher Toby Turtle
"Would you tell me, please, which way I ought to go from here?"
"That depends a good deal on where you want to get to," said the Cat.
"I don’t much care where--" said Alice.
"Then it doesn’t matter which way you go," said the Cat.
"--so long as I get SOMEWHERE," Alice added as an explanation.
"Oh, you’re sure to do that," said the Cat, "if you only walk long enough."
Lewis Carroll
(Alice's Adventures in Wonderland, Chapter 6)

Unlike Alice, Tiny Teacher Toby Turtle knows just where he is going. He knows when he will get there because he knows that the school is just 152 steps from his home. Teacher Toby also knows that 152 is also his age (in human years, that it).   He is diligently counting his steps.. When he finishes making 152 steps, he will be at Turtle School where he will teach all the other little turtles how to count so they will not lose their way in this life! 
Technique: 
Copic Markers
Copic On Paper Blending Inking Method
Sponging
Paper Piecing

Measurements:
Card Base 5.5 in. X 8.5 in.
Score and fold  at  4.25 in.  (This makes card for a 2A envelope)
Base Layer  4 in. X 5.25 in.
Base Focal  Layer 3.5 in. X 4.25 in.
Focal Image  3.5 in X  4 in

Supplies:  GKD:  Little Critters and Happy Camper

Copic Markers:
            Turtle: E40, 43, E45,
            Shell:    YG91, YG93, EY95, YG97, YG99
            Grass: G16, G19
            Sign:  E35, E37, E47, E44

Card Stock Cryogen White,  GKD Pure  White, Pumpkin Spice and
Fresh Asparagus

Ink : Memento Tuxedo Black, Angel Pink, Summer Sky, Cottage Ivy, Paris Dusk and Desert Sand

Tools: Scor-Pal or Scor-Buddy, Paper Cutter (I use Fiskars), Scissors  (Tim Holtz helps reduce pain for those with arthritis!), Quickie Glue, Adhesive and large sponge daubers

Tip of the Day:  If you are going to paper piece your project, it is ok to color outside the lines.   The outside will but cut away and you will have a clean finish!

 I hope you enjoyed this cute little card and story.  Stop by the Teapot Tuesday site at Splicoast Stampers and join inthe fun or look at some of the fabulous cards!

Stop back soon,
Hugs,
Marie


Thursday, June 30, 2011

T is for ???

Good morning everyone!   My friend Lisa at You Made Me Ink  is a design team member at Tip Top Tuesday Challenge and her fabulous card inspired me to participate in this fun challenge.  Drum roll... the challenge is   "T is for ???"   Yes be creative.  Anything with "T" goes.  What can be more fun than that?

I selected a digital image by Crafts and Me called "May"  I elected to use  a cluster of three metallic brads twice.   That is double the pleasure... Two  and Three!!!   Oh no triplets..  I also included a Tip!!!

Technique:
  • Copic Markers with Pastel Effect  (As in Suzanne Dean's Color Me Creative Classroom Class 3 Lesson 12)
  • Copic Tip to Tip Transferring
  • Flicking


Measurements:
Card Base 5.5 in. X 8.5 in.
Score and fold  at  4.25 in.  (This makes card for a 2A envelope)
Card Base Layer  4 in. X 5.25 in.
Base Top Layer  3.75 in X 5 in.
Card Top Layer 3.5 in. X  4.75 in.
Focal  Image : 3.25 in X 4.5 in.

 
Supplies:
Focal Image:  Crafts and Me "May"

Copic Markers:
Skin:  YR0000, YR000, E00, E02, R20
Hair:   E47, 3E45, E35, E31, E41, E49
Clothing:  BG0000, BG00, BG32, BG34, B0000, B00, B02,
Wings  R0000, R00, R20
Moon:  B000, B00, B02

                                                                                                                           
Card stock :  : Cryogen White for focal image,  GKD Pure Luxury White, Pure Luxury In the Navy, and pure Luxury Pumpkin Spice

Ink : Memento  Tuxedo Black

Tools: Scor-Pal or Scor-Buddy, Paper Cutter (I use Fiskars), Scissors  (Tim HoltzTonic scissors are great for people with arthritis and painful joints  and stamping block

Embellishments:  Self adhesive metal stickers, crystal Stickles 

Click to enlarge image for detail
Tip of the Day:   Do your craft scissors ever get to be a sticky mess?   Try nail polish remover! Easy Peasy!

Thank for stopping by and come back real soon!
 
Hugs,
Marie

Wednesday, June 29, 2011

Color Me Creative Challenge #21 FOLDS!

Hello to all my wonderful cyber friends!   Color Me Creative Challenge # 21  is coloring folds, pleats or ruffles and will run until July 8th!  Get out those Copic Markers and have some fun!   Our fabulous sponsor is  Tiddly Inks.    Christy Croll is the artist and owner and she has a mega selection of super cute images to check out.  The Prize for the winner of this challenge (randomly chosen) will get:
A $20 Gift Certificate to spend at Tiddly Inks thanks to Christy!!

I selected a wonderful image from Tiddly Inks  for my CMC DT card called "You and Me Baby"


 Click image to enlarge


Technique:
  • Copic Markers   (My consuming addiction!)    LOL
  • Folds:  The image did not have folds that jumped out at you so I enhanced them using the technique for coloring folds in Suzann
Personal Challenge:    I want to experiment with shading and definition and  make my "black" more interesting.  Marianne Walker has a book called Shadows & Shading   that can be found HERE    In her book, Marianne states that very little in this world is truly black.   You may notice that I deviated from just using my "C" Copic markers and  I added some blue to the coat of our cute little man !!!  It was fun and I think I will try to do this more and more often! 


    Measurements:
    Card Base 5.5 in. X 8.5 in.
    Score and fold  at  4.25 in.  (This makes card for a 2A envelope)
    Card Base Layer  4 in. X 5.25 in.
    Card Top Layer 3.75 in. X  5 in.
    Focal  Image cut with Small/Large  Petite Oval Nestabilities
    Focal  Base layer  cut with Small/Large Petite Oval Nestabilities

    Supplies:
    Focal Image:  Tiddly Inks Digital   “You And Me Baby”

    Paper:  Cryogen for focal image, GKD Pure Luxury White and In the Navy  and some super cool designer paper

    Copic Markers:
    Skin:  YR0000, YR000, E00, E02  R20
    Hair:   E40, E41, E43 and E30, E33, E35, E37
    Dress:   R0000, R000, R21, Colorless Blender

    Ink : Memento  “Tuxedo Black” and "Desert Sand"

    Tools: Scor-Pal or Scor-Buddy, Paper Cutter (I use Fiskars), Scissors  (Tim Holtz Tonic scissors are great for people with arthritis and painful joints),  Sponge Daubers,  Pop Dots Cuttlebug, Nestabilities Small/Large Petite Oval
    Embelishments: Pearls, Ribbon

    Click image to enlarge

    Tip of the Day: Using your colorless blender will allow the folds to appear to have more dimension.  It will also bridge colors you may be lacking in your color palate by bridging two color buddies that are more than 2 or 3 shades  different in brightness (that is the last number on your Copic Marker).

    You know I am always a little "excessive" so keeping true to form, I created a second card featuring folds.

     Click image  to enlarge

    Copics: 
    Skin YR 0000, YR000, E00, E02, R20
    Hair:  E40, E41, E43, E44, E31
    Dress BV0000, BV00, BV02, BV04, Colorless Blender, BV08
    Top: R20, R22, R24

    It was great having you!  Come back soon!
    Hugs,
    Marie


    Friday, June 24, 2011

    Copic Creations Doodling Challenge

    Copic Creations  says.....  "doodle".   Yes, you heard it correctly.  The challenge is to   create a card using Copics and to doodle.  I used a cute little image by Kenny K called "Brooklyn Babe"    I  had so much fun doing this I decided to try my hand at drawing.  I bought a book by Barbara Bradley called Drawing People.   I decided to drawn an image that looks vintage and I will call her "Bella".


    Brooklyn Babe
    Life is Good


    Free Hand Sketch
    Bella

     
    Technique:
    • Copic Markers
    • Vintage
    • Free Hand Sketch   
    • Doodle   


    Measurements:
    Card Base 5.5 in. X 8.5 in.
    Score and fold  at  4.25 in.  (This makes card for a 2A envelope)
    Card Base Layer  4 in. X 5.25 in.
    Card Top Layer 3.75 in. X  5 in.
    Focal  Image : 3.5 in X 4.75 in.


    Supplies:
    Focal Image:  Kenny K  “Broklyn Babe” 

    Copic Markers:
    Skin:  YR0000, YR000, E00, E02, R20
    Hair:   E47, 3E45, E35, E31, E41, E49
    Clothing:  BG0000, BG00, BG32, BG34, B0000, B00, B02,
    Lollipop: R20, R59
    Doodling:  Black Copic Multiliner, BG32, B02
                                                                                                                               
    Card stock :  : Cryogen White for focal image,  GKD Pure Luxury White, Pure Luxury Ocean Mist and an aqua color from Bazzill

    Ink : Memento  “Tuxedo Black”

    Tools: Scor-Pal or Scor-Buddy, Paper Cutter (I use Fiskars), Scissors  (Tim HoltzTonic scissors are great for people with arthritis and painful joints  and stamping block


    Tip of the Day:  If you use Copic Markers with your sketch or doodling, make certain you use a Copic multiliner and erase your pencil marks in order to keep your Copic Marker tip in good condition!


     This is the cute little Brooklyn Babe!  Some attitude!

     Click image to enlarge


     As I said.... this was a lot of fun so I took myself to Michaels and  found a book on Drawing People  by Barbara Bradley  .......  a 101 class!   Yes I know,,, I made her butt gigantic!  I guess I need to work on proportion!


     I sketched the  image...  I will call her "Bella"  took a picture and printed   on my laser printer.
    Bella look very vintage so I matted it to enhance the vintage look..
    Copics  :  E000 (I found it), E00, E02, C00, C0, C3 C5, C7
    If  Barbara Bradey see's this she will probably recommend I start with preschool! But I did have fun! 

    Hope you enjoyed this and thank you so much for stopping by. Come back soon.  I am going to post the next  Color Me Creative Challenge  in a coupe days...   It will be so much fun and  I can hardly wait to see all the wonderful cards!

    Hugs,
    Marie


    What a Sweet Treat!

    A special  "Thank You" to Cindy at Cindy's Antics for nominating me for the Irresistibly Sweet Blog Award!  
    How sweet!  Thank you Cindy!

    There are three things one much do to accept this "Sweet" award.
    • Thank the person who nominated you for this wonderful award and make a link to their blog.
    • Name 7 random things about yourself.
    • Pass this award on to 8 wonderful cyber friends.
     7 Things About Myself
    • One of my favorite places to visit is New Orleans.  I had a fabulous time there a couple years ago and I can hardly wait to return!  Love those  beignets at Cafe Du Monde
    • I am a cancer survivor with a h/o a very rare form of leukemia. I was in a research program with the first 50 humans and it saved my life!  YA to all survivors!
    • Just landscaped my backyard and I have 18 turkeys sitting all over it and ruining it at this moment.
    • Just got an IPad 2 and this old girl is trying to figure out how to use it.
    • I work in am emergency room as a Kaiser Permanente Case Manager.  I absolutely love my job and I feel like I am making some small difference every day.   
    • I have an obsession with Copic Markers and currently serve as a proud senior design team member with Color Me Creative Classroom  and Suzanne Dean is our  "fearless leader"!
    • I am BEYOND shy!  :)
    And now to pass this honor on to 8 of my wonderful cyber friends
     This has been a fun opportunity to share a little about myself and to honor some of my cyber friends who faithfully support me in my blogging journey!

    Hugs,
    Marie


        Monday, June 20, 2011

        Gifts from the Sea


        • Stamp TV  and the theme is "paper piecing"

        I am using two Gina K stamp sets for this challenge
        • By the Sea by Theresa Momber
        • Gifts from the Sea by Melanie Muenchinger
         Click image to enlarge

        Technique : 
        • Copic Markers
        • Sponging
        • Personal challenge was to try to make the waves splash against the rocky bank like it does in Northern California!
        • Paper Piecing
        • And of course I am using  Suzanne Dean's Copic blending techniques from Color Me Creatiave Classroom

        Measurements:
        Card Base 5.5 in. X 8.5 in.
        Score and fold  at  4.25 in.  (This makes card for a 2A envelope)
        Base Layers :  4 in. X 5.25 in.
        Focal Image Layer :   3.75 in. X  5 in.  
        Focal Image:  3.5 in. X 4.5 in
         
        Supplies:
        Focal Image:    GKD/Illustrtor Melanie Muenchinger "Gifts from the Sea

        Background Image: GKD/Illustrator Theresa Momber "By the Sea" 
        Copic Markers:
                    Lighthouse:  E000, E00, E02, E11 and  E30, 33, E35, Colorless Blender
                    Sand:   W00, W0, W2, W5
                    Waters:  B000, B00, B32, B34 (and sponging)
                    Sky:  B00, B000, RV000, RV00, R20

        Card Stock   Pure Luxury White,  Pure Luxury Chocolate Kiss and  a Bazzill rust color ( I do not recall the name).  

        Ink : Memento Black, Summer Sky, Paris Dusk, Desert Sand, Potter's Clay, Cantaloupe

        Tools: Scor-Pal or Scor-Buddy, Paper Cutter (I use Fiskars), Scissors  (Tim Holtz helps reduce pain for those with arthritis!), Quickie Glue Pen, Adhesive,large sponge daubers, pop dot. 

         Tip of the Day :  Cutter Bee scissors work well for paper piecing.  You can easily cut next to the outline of your image  Another trick is to turn the paper while cutting rather than turning  or twisting your scissors. 

         Thank you so much for taking the time to view my card!  Come back soon.

        Hugs,
        Marie


        Wednesday, June 15, 2011

        "Missing You" Study in Sepia Tone and Black Tone


        Hello everyone!  I have a few days off and plan to spend some quality time in my art room today and will be enjoying tomorrow at a crafting marathon with wonderful friends!  Great Friends.  Great food.  Crafting all day.   Who could ask for more!  LOL


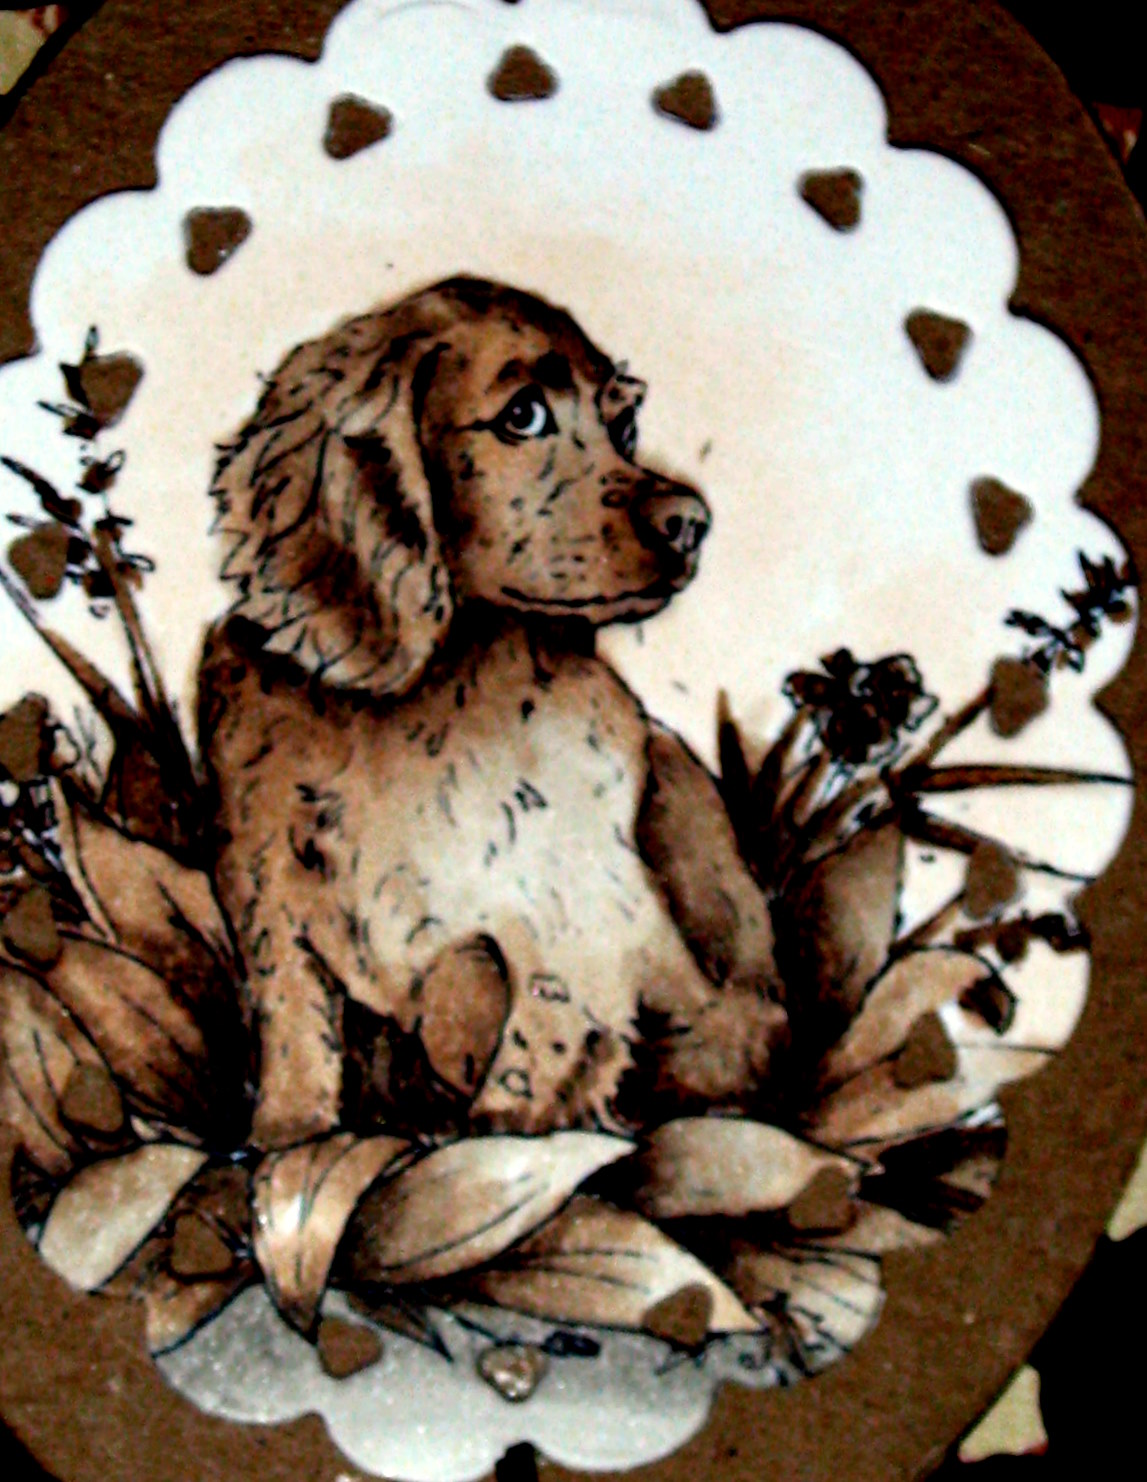
        As you are  probably aware, I have been taking Copic Classes from Suzanne Dean at  http://scrapbitzcopics.ning.com/   I am on my first lesson for Class 4.  I needed to use the same image for both Sepia Tone  and Black Tone.   I selected one of my very favorite images from Just Inklined -  “Cocker Spanial Pup”.

        I am entering this card in two challenges (I appologize that my link is not working correctly and the URL only shows rather than the name.  I am told that blogger will be fixing that!)

        Sepia Tone using   E40,  E41, E42, E44
        Click image to enlarge
        This is a close-up of the little cutie.
        Click image to enlarge
        Technique:  Vintage
        • Copic Sepia Tone
        • Copic Black Tone


        Measurements:
        Card Base 5.5 in. X 8.5 in.
        Score and fold  at  4.25 in.  (This makes card for a 2A envelope)
        Base 5.25 in. X 4 in.
        Base layer: 5 in X 3.75 in. 
        Focal Image: Spellbinders Nestabilities Beaded Ovals Die

        Supplies:
        Focal Image:  Digital Image by Just Inklined  “Cocker Spanial Pup”

        Copic Markers:
        Sepia Tone:  E40,  E41, E42, E44
        Black Tone C00, C1, C3, C5, C7

        Card stock :
        Sepia Tone:   Cryogen White,  GKD Pure Luxury  in White,  Pure Luxury Chocolate Kiss,  Kraft  and Designer Paper
        Black tone:  :   Cryogen White,  GKD Pure Luxury  in White,  Pure Luxury  Black Onyx, Moonlit Fog  and Designer Paper

        Ink : Memento Black

        Tools: Scor-Pal or Scor-Buddy, Paper Cutter (I use Fiskars), Scissors  (Tim Holtz helps reduce pain for those with arthritis!), Quickie Glue Pen, Adhesive, Cuttlebug or die cutter,  Spellbinders Nestabilities Beaded Ovals and Cricut,

        Embellishments: Cream Pearl Pen by VIVA, Storybook Cartridge for corner embellishment. You can use the flourish or corner embellishment of your choice.

        Tip 1:  I had a really fabulous tip for you.....   I forgot what it was...   This ole lady can't remember squat!   Well here is another one!   If you have a Cricut or Die Cutter, you can use that for flourishes and save a bundle! 

        Tip 2:  Spellbinders Nestabilities “Beaded Ovals” did not  “nest” as well as I would have liked so I cut two (different colors) and trimmed the beaded portion away, sanded my edges and used the inner oval inside my outer beaded layer.   I discovered the petite or large ovals were a different shape… therefore…. I created my own. Again…. Saving a bundle!

         Black Tone using C00, C1, C3, C5, C7
        Click image to enlarge

        Doesn't he have just the cutest little face?
        Click image to enlarge

        Thank you for taking your time to look at my cards.  Please feel free to leave a comment.   
        I hope you have a wonderful day!

        Hugs,
        Marie


        Friday, June 10, 2011

        Only Once in a Lifetime

        Click image to enlarge
        Happy Saturday everyone!  It is time again for Color Me Creative Classroom to have another fabulous challenge. Get out those Copic markers and let's color "brunette" hair! You have two weeks to join in the fun and win some fabulous blog candy!

        For my selection, I am using a wonderful image by Sugar Nellie called "Flora".

        Technique:
        Copic Pastel Effect
        Light Brunette Hair

        Measurements:
        Card Base 5.5 in. X 8.5 in.
        Score and fold at 4.25 in. (This makes card for a 2A envelope)
        Card Base Layer 4 in. X 5.25 in.
        Card Top Layer 3.75 in. X 5 in.
        Focal Image cut with Classic Round Nestabilities
        Focal Base layer cut with Classic Scalloped Nestabilities

        Supplies: Focal Image: Sugar Nellie Digital Stamp “Flora”

        Copic Markers:
        Skin: YR 0000, YR 000, E00 R20
        Dress: BG0000, BG02 and a touch of BG07, Colorless Blender
        Hair: Light Brunette E25, E29, E31
        Flowers: G40, YG03, YG99 (a touch), BV0000, BV11
        Shoes: C5, C3, Colorless Blender
        Halo Effect   Cannot remember but I would not do it again!! LOL

        Card stock :  Cryogen White for focal image, GKD Pure White and Ocean Mist

        Ink : Memento Tuxedo Black and Summer Sky

        Tools: Scor-Pal or Scor-Buddy, Paper Cutter (I use Fiskars), Scissors (Tim HoltzTonic scissors are great for people with arthritis and painful joints), Sponge Daubers, Pop Dots Cuttlebug, Nestabilities
        Classic Round and Scalloped/

        Embellishments:: Magnolia  Doohickeys and pearls.

        Tip of the Day: "Tip to Tip" method with Copic Markers is a wonderful way to blend.  Touch the lighter color to a darker color and the blending becomes much easier. 


        Skin: YR 0000, YR 000, E00 R20


        The Tip to Tip method can be used with two markers with the same color family or with a colored marker with the colorless blender.  The second method produces a pastel effect.

         Dress: BG0000, BG02 and a touch of BG07, Colorless Blender

        Hair: Light Brunette E25, E29, E31


        I added a YR halo around the image.  I would definitely not use the same color again!  I mounted the image and added pearls and a sentiment.
          
        If you are interested in learning about the different Copic marker techniques - Suzanne Dean offers some fabulous on-line classes  I am on her fourth class at this time.  If interested, you can check out Suzanne's classes  at   http://scrapbitzcopics.ning.com/page/class-room-info
        I hope you enjoyed this tutorial. Please stop by soon.  

        Hugs,
        Marie


        Sweet Serenity


        Hello everyone! I am participating in a fun challenge at Stamp TV The challenge is to add texture. I selected a beautiful image from "By the Sea". I just love the ocean and would love to live there if I didn't have the day job ! LOL


        Technique:
        Copic Markers
        Sponging
        Paper Piecing
        Embossing (by hand)
        Texture: hand embossing and rope


        Measurements:

        Card Base 5.5 in. X 8.5 in.
        Score and fold at 4.25 in. (This makes card for a 2A envelope)
        Card Base Layer 4 in. X 5.25 in.
        Focal Image Mat 3 in. X 4.75 in. and then matted

        Supplies:
        Focal Image: Gina K: Illustrator Theresa Momber “By the Sea”

        Copic Markers:
        C9, C7, C5, C3, YR0000, YR 23, YR 21, E49, E44, E42, E40

        Card stock : : Cryogen White for focal image, GKD Pure White and Sweet Mango, Black Onyx

        Ink : Memento “Tuxedo Black” Paris Dusk, Summer Sky, Cantaloupe, Angel Pink Rose Bud

        Tools: Scor-Pal or Scor-Buddy, Paper Cutter (I use Fiskars), Scissors (Tim HoltzTonic scissors are great for people with arthritis and painful joints), Spong Daubers, Pop Dots Embossing plate and embossing tool.

        Embelishments: Twine tied with three Franciscan knots.


        Tip of the Day: When you paper Piece, pull the paper away towards the back in order to give a more finished project and smoother lines. 


        Click to enlarge


        This is a close up of the focal image.   I sponged the background with Memento ink.   Since the challenge was to "texture" the image,  I used an embossing plate and hand tool and embossed waves into the water and used a gelly pen to accent the wave.  I also elected to add texture byadding twine and  making Franciscan knots. 


        Thank you for sharing your time with me. Please come back soon.

        Hugs,
        Marie

        Friday, June 3, 2011

        Memories

        Wishing a wonderful Friday to everyone! Copic Creations is having a challenge and celebrating a 2 year Blogoversary. Check out all the candy they are giving out to the lucky winners. Oh I hope it's me! Shameful isn't it?... I say with a big smile! One would think it is Christmas in June! They have a challenge using Copic Markers using the "Distressing" technique. Suzanne Dean has an on-line class using this technique at Color Me Creative Classroom. But don't just take my work for it.... Suzanne also has some wonderful video's on Distressing with Copic Markers for free at Copic Creations. Just check out her fabulous tutorials!


        Click image to enlarge

        Technique:

        Copic Markers
        Distress Look with Copics


        Measurements:
        Card Base 5.5 in. X 8.5 in.
        Score and fold at 4.25 in. (This makes card for a 2A envelope)
        Card Base Layer 4 in. X 5.25 in.
        Card Top Layer 3.75 in. X 5 in.
        Focal Image cut with Smal/Large Petite Oval Nestabilities
        Focal Base layer cut with Small/Large Petite Oval Nestabilities

        Supplies:

        Focal Image: Sugar Nellie Digital Stamp “Nathan”

        Copic Markers:
        Skin: YR0000, YR000, E00, E02
        Hair: E47, 3E45, E35, E31, E41
        Clothing: E45, E35, E00, YR000, Colorless Blender (I lost my E000 – so sad)
        Bear: W3, W1, W0, W00

        Card stock : : Cryogen White for focal image, GKD Pure Luxury “Kraft”, A Bazzill dark brown and Designer .

        Ink : Memento “Tuxedo Black” and Tim Holtz Distress Ink “Vintage Photo”

        Tools: Scor-Pal or Scor-Buddy, Paper Cutter (I use Fiskars), Scissors (Tim Holtz Tonic scissors are great for people with arthritis and painful joints), Sponge Daubers, Pop Dots Cuttlebug, Nestabilities Small/Large Petite Oval

        Embelishments: Ribbon from GKD


        Tip of the Day:
        Emboss your focal image layer after you cut it with the die. This will add dimension to the image. Flip it over, place some tape on the back to secure it to the die and then gently sponge the edges with your dauber. This will increase your dimensional look even more!


        I am also totally in love with Sugar Nellie images! I found this wonderful digital image from Funky Kits. I may make another card and enter in a few days. If you would like to enter the Sugar Bowl Challenge.... it can be found HERE.


        Click image to enlarge

        I added the sentiment. Don't you just love these Sugar Nellie images? I think the face on all her images are so adorable.

        Thank you so much for stopping by to see my creations! Please feel free to make my day and make a comment! Come back soon!

        Hugs,
        Marie

        Thursday, June 2, 2011

        Boo and Snookie Say Hello

        Hi everyone! Check out the new challenge at The Emerald Faeries Challenge. What a fun, whimsical land! It is the home of Boo and other gorgeous Aussie Faeries. Challenge # 2 is to use a lot of "Bling".

        This is the card I used for the challenge.


        Click image to enlarge

        I purchased this adorable little stamp called Boo and Snookie from The Emerald Faeries Collection .

        Measurements:
        Card Base 5.5 in. X 8.5 in.
        Score and fold at 4.25 in. (This makes card for a 2A envelope)
        Card Base Layer 4 in. X 5.25 in.
        Card Top Layer 3.75 in. X 5 in.
        Focal Image cut with Smal/Large Petite Oval Nestabilities
        Focal Base layer cut with Small/Large Petite Oval Nestabilities

        Supplies:
        Focal Image The Emerald Faeries Collection “Boo and Snookie”
        Copic Markers: , Boo - E30, E31, E35, E40, E42, E49, YR0000, YR000,
        Snookie -YG91, YG93, YG94, YG 97, YG99
        Clothing YR0000, YR000, YR14, YR18
        Wings: Y0000, Y00, YR00

        Card stock : Cryogen White for focal image, GKD Pure Luxury “Pure White”, Chocolate Kiss, Fresh Asparagus andDesigner paper.

        Ink : Memento “Tuxedo Black” and Tim Holtz Distress Ink "Vintage Photo"

        Tools: Scor-Pal or Scor-Buddy, Paper Cutter (I use Fiskars), Scissors (Tim HoltzTonic scissors are great for people with arthritis and painful joints), Pop Dots Cuttlebug, Nestabilities Small/Large Petite Oval ,Magnolia Doohickeys Die (I used the die cut for embelishment and the negative image for stenciling the background).

        Embelishments: Pearl Pen by Viva, Stickles


        Tip of the Day: You can use the negative space from your paper you used for the die cut and it becomes a stencil. And it is FREE!


        Thank you for stopping by. Come by soon!

        Hugs,
        Marie

        Wednesday, June 1, 2011

        Spring Wonder


        Happy Wednesday to everyone! I have a few days off from work and can hardly wait to hit the art room! The challenge for coloring "feathers" with Copic Markers is still open for participation. Anyone can play along at Color Me Creative Challenge . It's a fun challenge group with 2 challenges & prizes every month to get you using those Copic skills. Come chat with us and have some fun! Click on the GROUPS tab at the top of the CMCC page and then click on the CMC Copic Challenge Group (you do not have to be a student to join us)!!

        And by the way, the new Junior Design team members have been added to our Color Me Creative challenge group. Stop by and check out their bio's and blogs. They are a fabulous group!

        I created a second card for this fun challenge. I named the card Spring wonder. I combined a GKD stamp with a digital stamp from Prairie Fairy Designs.


        Click image to enlarge

        Technique:
        Copic Markers
        Feathers


        Measurements:

        Card Base 5.5 in. X 8.5 in.
        Score and fold at 4.25 in. (This makes card for a 2A envelope)
        Card Base Layer 4 in. X 5.25 in.
        Card Top Layer 3.75 in. X 5 in.
        Focal Image cut with Smal/Large Petite Oval Nestabilities
        Focal Base layer cut with Small/Large Petite Oval Nestabilities

        Supplies:
        Focal Image: GKD/Illustrator Asela Hopkins “Winter Wings” : Prairy fairy- digital image “Cherry Blossoms”

        Copic Markers:
        Bird: B0000 B00, B21, B24, B26, B28 and B29, Gelly Roll Pen “White”
        Cherry Blossoms: RV0000, RV30, RV33, Rv34
        Branches: E30, E37, YR20, RY21, E27, E47


        Card stock : Cryogen White for focal image, GKD Pure Luxury “Pure White”, Chocolate Kiss: and Designer paper.

        Ink : Memento “Tuxedo Black” and “Bahama Blue”

        Tools: Scor-Pal or Scor-Buddy, Paper Cutter (I use Fiskars), Scissors (Tim HoltzTonic scissors are great for people with arthritis and painful joints), Pop Dots Cuttlebug, Nestabilities Small/Large Petite Oval


        Tip of the Day: Keep a notebook with you on your nightstand or carry it with you when you travel to jot down those moments of inspiration!

        Thank you so much for stopping by on this windy, rainy day. Your visit brings a bit of sunshine!

        Hugs,
        Marie