Happy Friday to all my wonderful cyber friends! I have a day off and yet bet.... I am spending as much time as I can in my craft room!
There are two wonderful challenges I am participating in today.
Copic Creations The challenge for Copic Creations is to use you Copic markers to create "white" clothing. The wonderful sponsor and prize for one lucky winner will be:
What’s the prize this week??!
A $25.00 GIFT CERTIFICATE TO LA LA LAND CRAFTS!!!!
Woooooooo Hoooooooooo!
The challenge for Top Tip Tuesday is to create a "wedding" card or and "anniversary" card. This site is just wonderful. If you haven't had a chance to stop by yet, you will be in for a surprise! They offer "tips" and who couldn't use tips on new and easier techniques! The is the wonderful sponsor and the winner will receive 2 digi's from:

What fantastic sponsors!!!
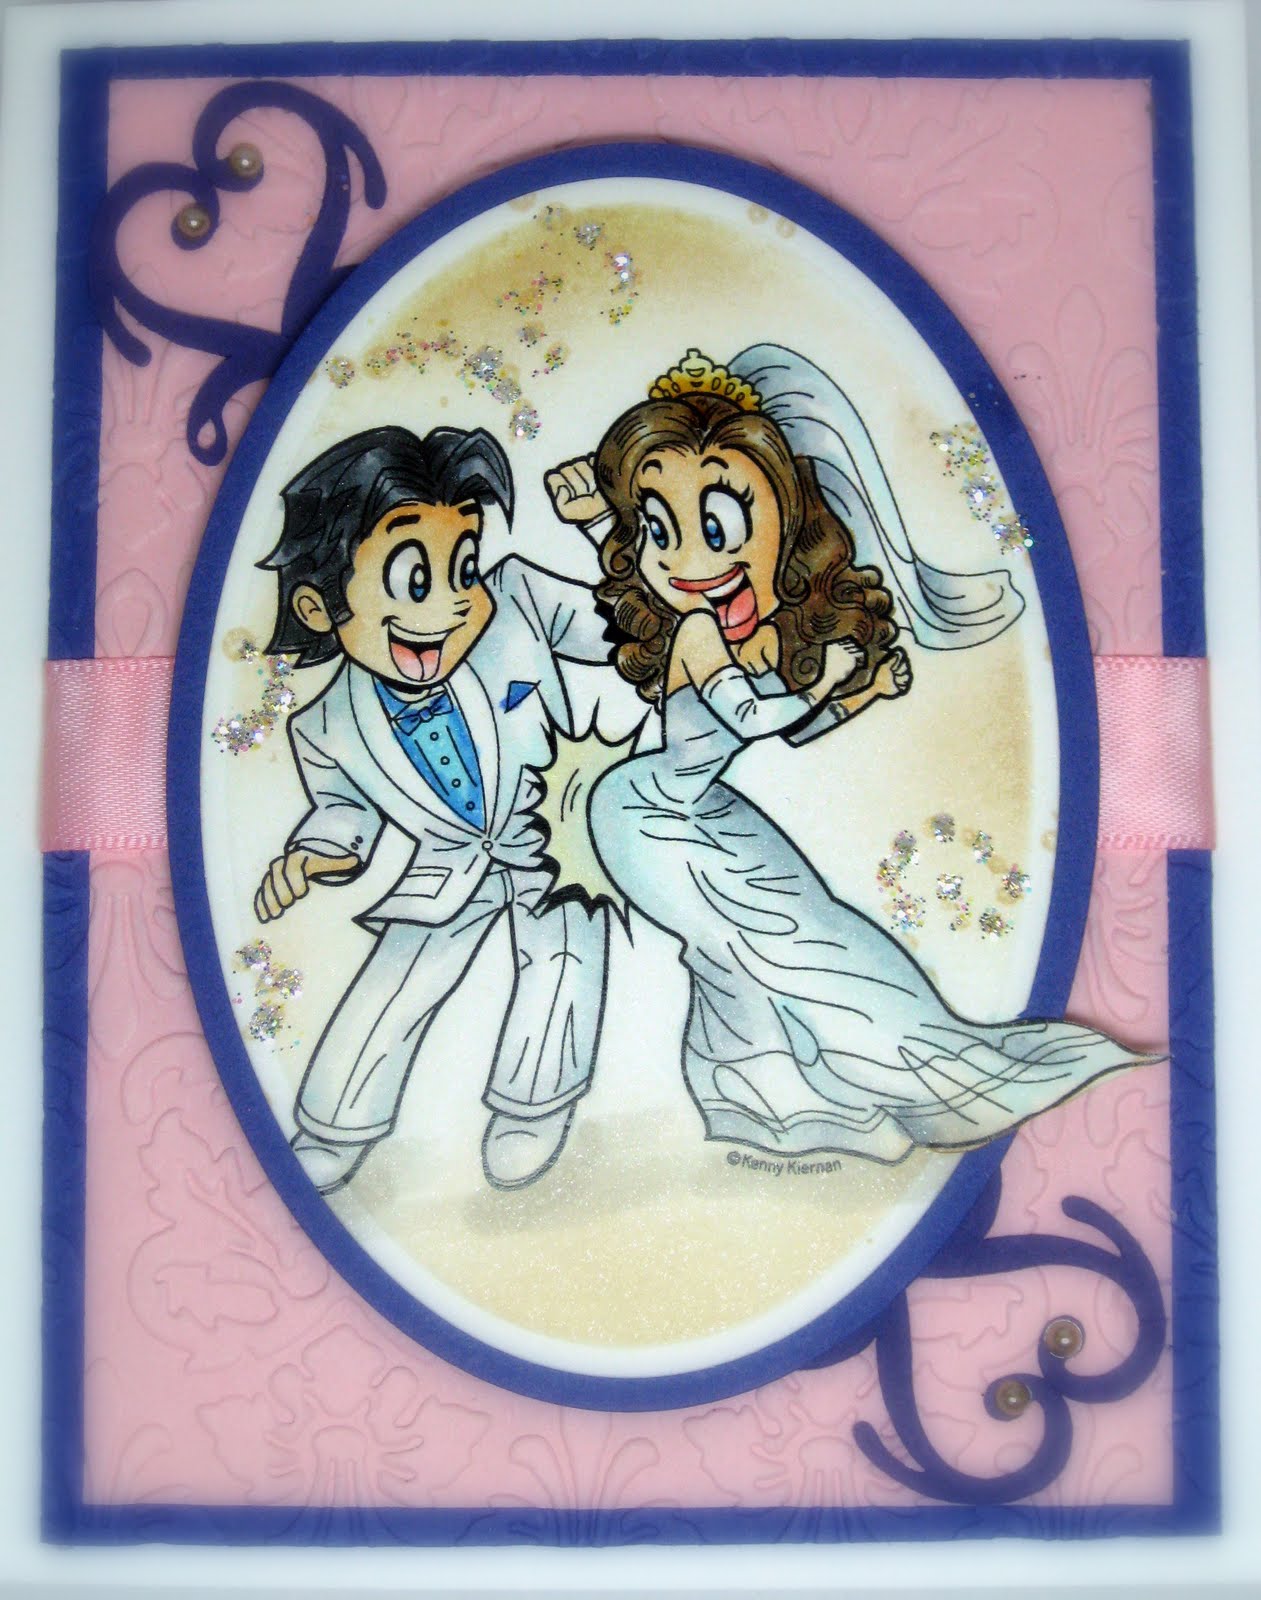
The card I made for these challenges is from Kenny K's Digital image called "Wedding Dance".
The card I made for these challenges is from Kenny K's Digital image called "Wedding Dance".
Click image to enlarge
Technique:
- Coloring White with Copic Markers
- On Paper Blending Technique
Measurements:
Card Base 5.5 in. X 8.5 in.
Card Base 5.5 in. X 8.5 in.
Score and fold at 4.25 in. (This makes card for a 2A envelope)
Base Layers 4 in. X 5.25 in. and 3.75 in. X 5 in
Base Layers 4 in. X 5.25 in. and 3.75 in. X 5 in
Focal Image Layer Large Petite Spellbinder Nestabilities
Base Focal Image Layer Large Petite Oval Spellbinder Nestabilities
Supplies:
Focal Image: Kenny K Digital Image: “Wedding Dance”
GKD: Melanie Muenchinger “Bring the Bling”
Copic Markers:
Face: E000, E00, E01, E11 touch of R20
White Clothing: C1, C0, C3, B10
Groom’s Shirt: BG05, BG00,BG0000
Groom’s Hair: C3, C5, C7, C9
Bride’s Hair: E49, 47, E44, E41
Card Stock Cryogen White, GKD Pure White, Bubblegum Pink and Bazzill Smoothies Boysenberry
Ink : Memento Black and Desert Sand
Tools: Scor-Pal or Scor-Buddy, Paper Cutter (I use Fiskars), Scissors (Tim Holtz helps reduce pain for those with arthritis!), Quickie Glue Pen, Adhesive,large sponge daubers, Spellbinders Nestabilities Large Oval Die, Cuttlebug and Kassie’s Brocade embossing folder, Criicut Die Cutter .
Embellishment: Stickles, Pearls, Flourishes from Cindy Loo Cricut Cartridge
Tip of the Day. Save mega bucks by using you Cricut cartridges for flourishes. I spent $25.95 for one flourish die and decided I would pull out my Cricut and find flourishes on my old carts that work! I used Cindy Loo Cricut Cart for my flourishes and made them look like hearts. I discovered that just about every page of the Cindy Loo Cart has flourishes! Great discovery!
Click image to enlarge
I stamped the background of the focal image with "Bring the Bling" with a vry light ink by Memento called "Desert Sand" and then used Stickles on the spiral design. I then used my Cuttleug to emboss the base card layer. I used Cindy Loo Cricut Cart for my flourishes. I put them together to form a heart and added pearls.
I hope you have a fabulous day and weekend. Thank you for stopping by. Come back soon. I will post the new Color Me Creative Challenge Sunday.
Hugs,
Marie