Thursday, April 30, 2015

mp050115c

Hi everyone and happy Friday!
Marie here with a tutorial on coloring Brunette Hair using Shin Han Twin Touch Markers.   The same technique will apply to Copic Markers and any alcohol ink based marker!


All my video Tutorials can be found HERE.

mp050115b
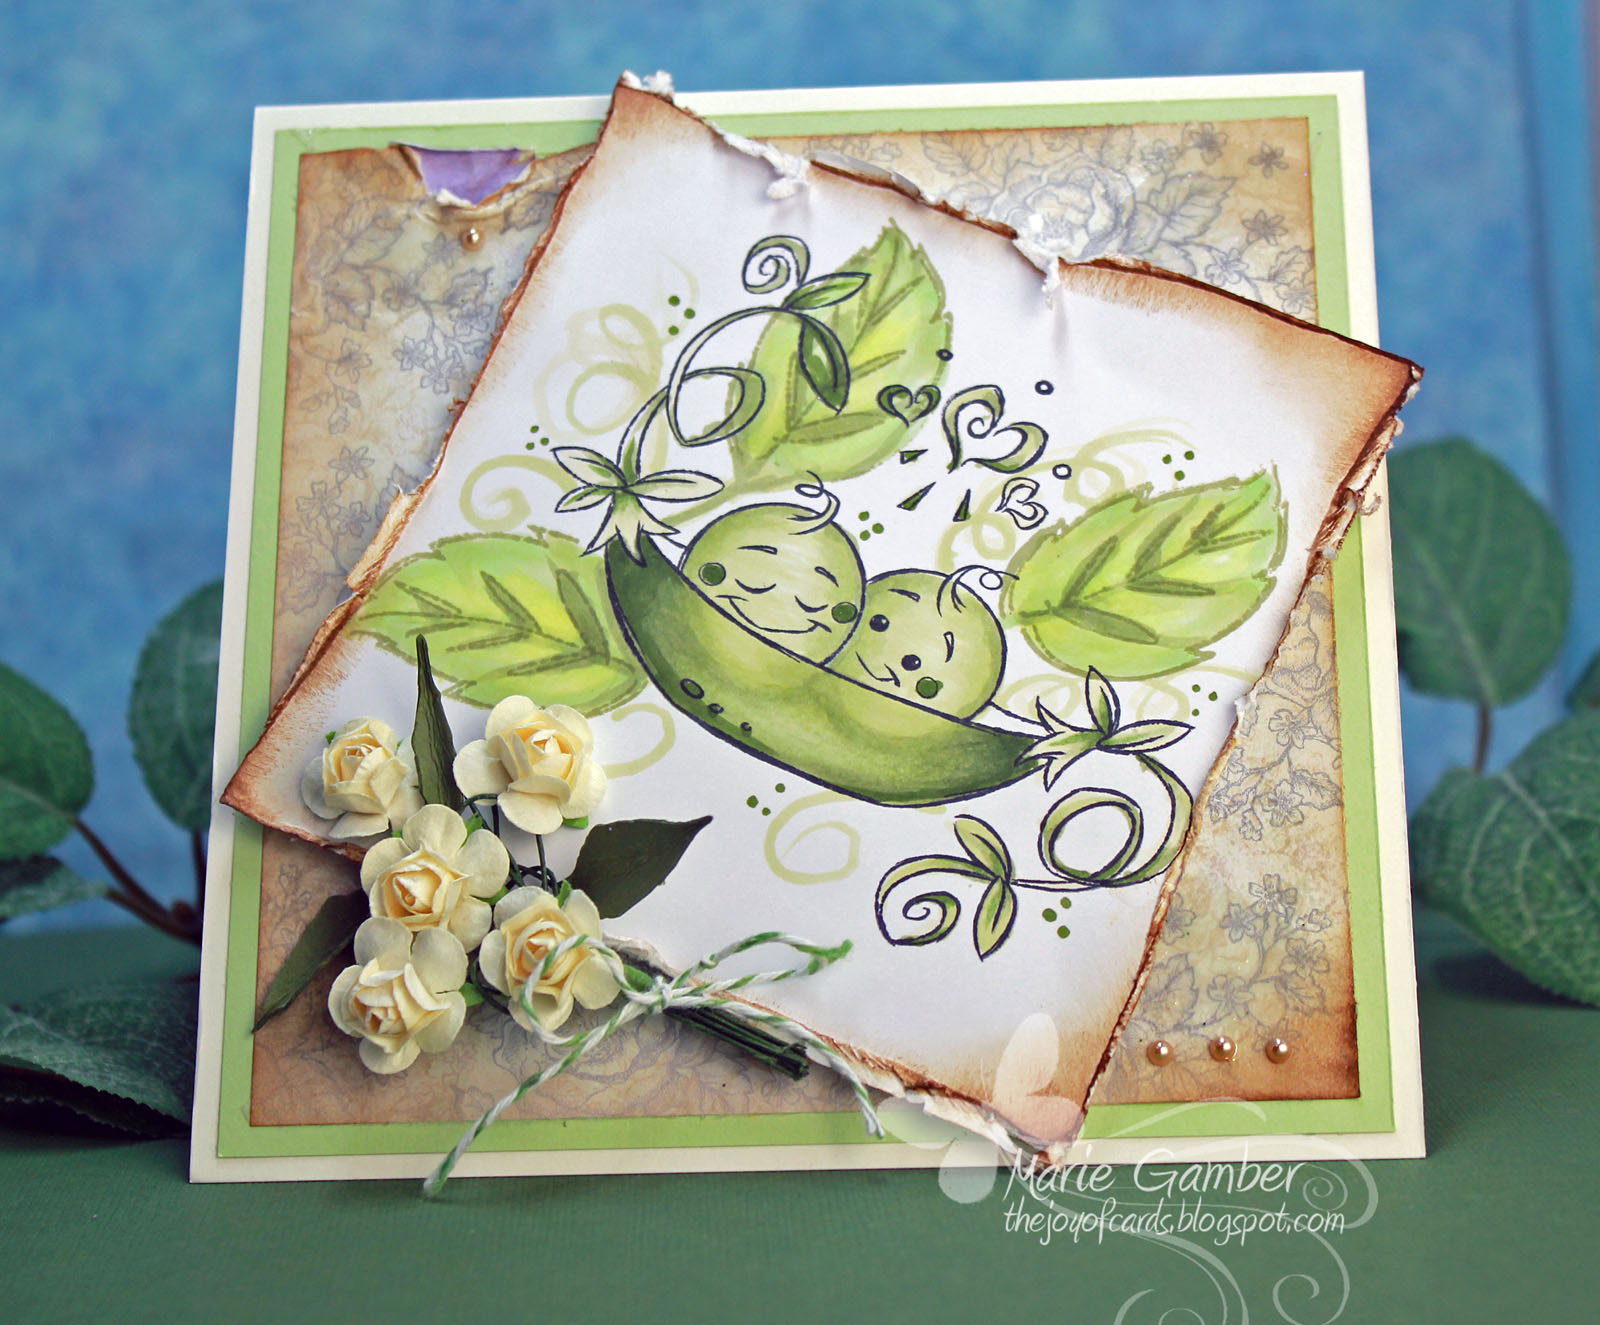
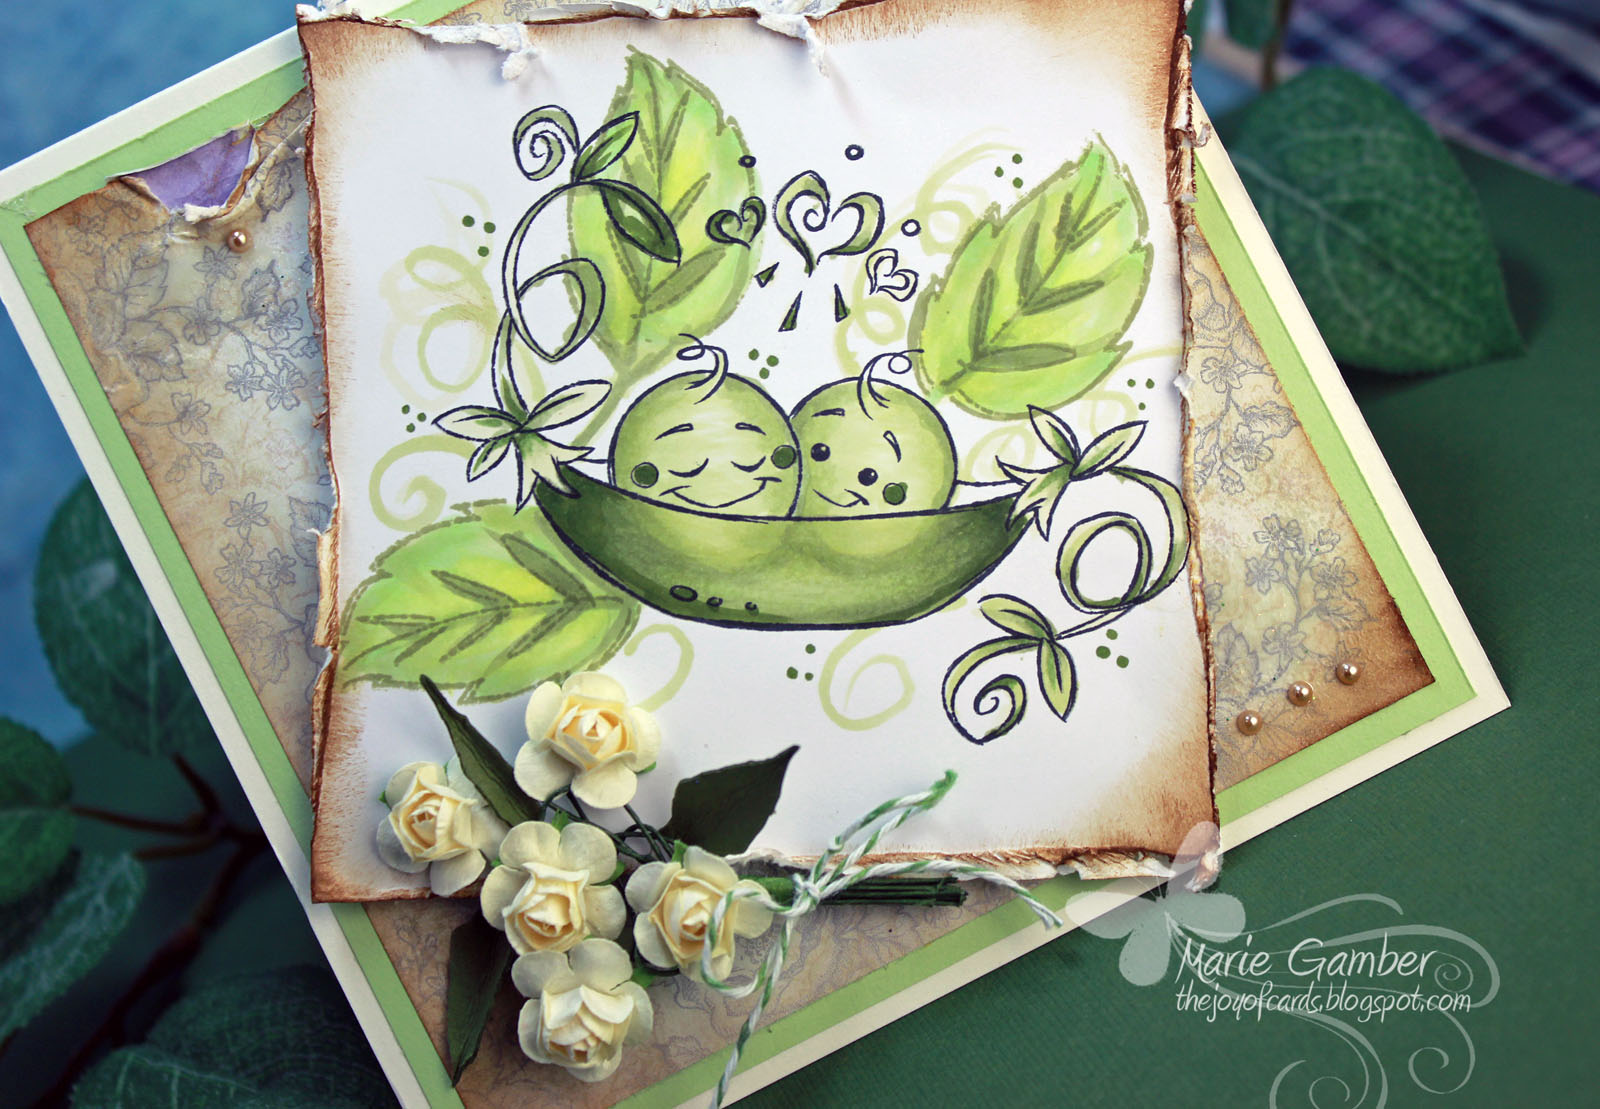
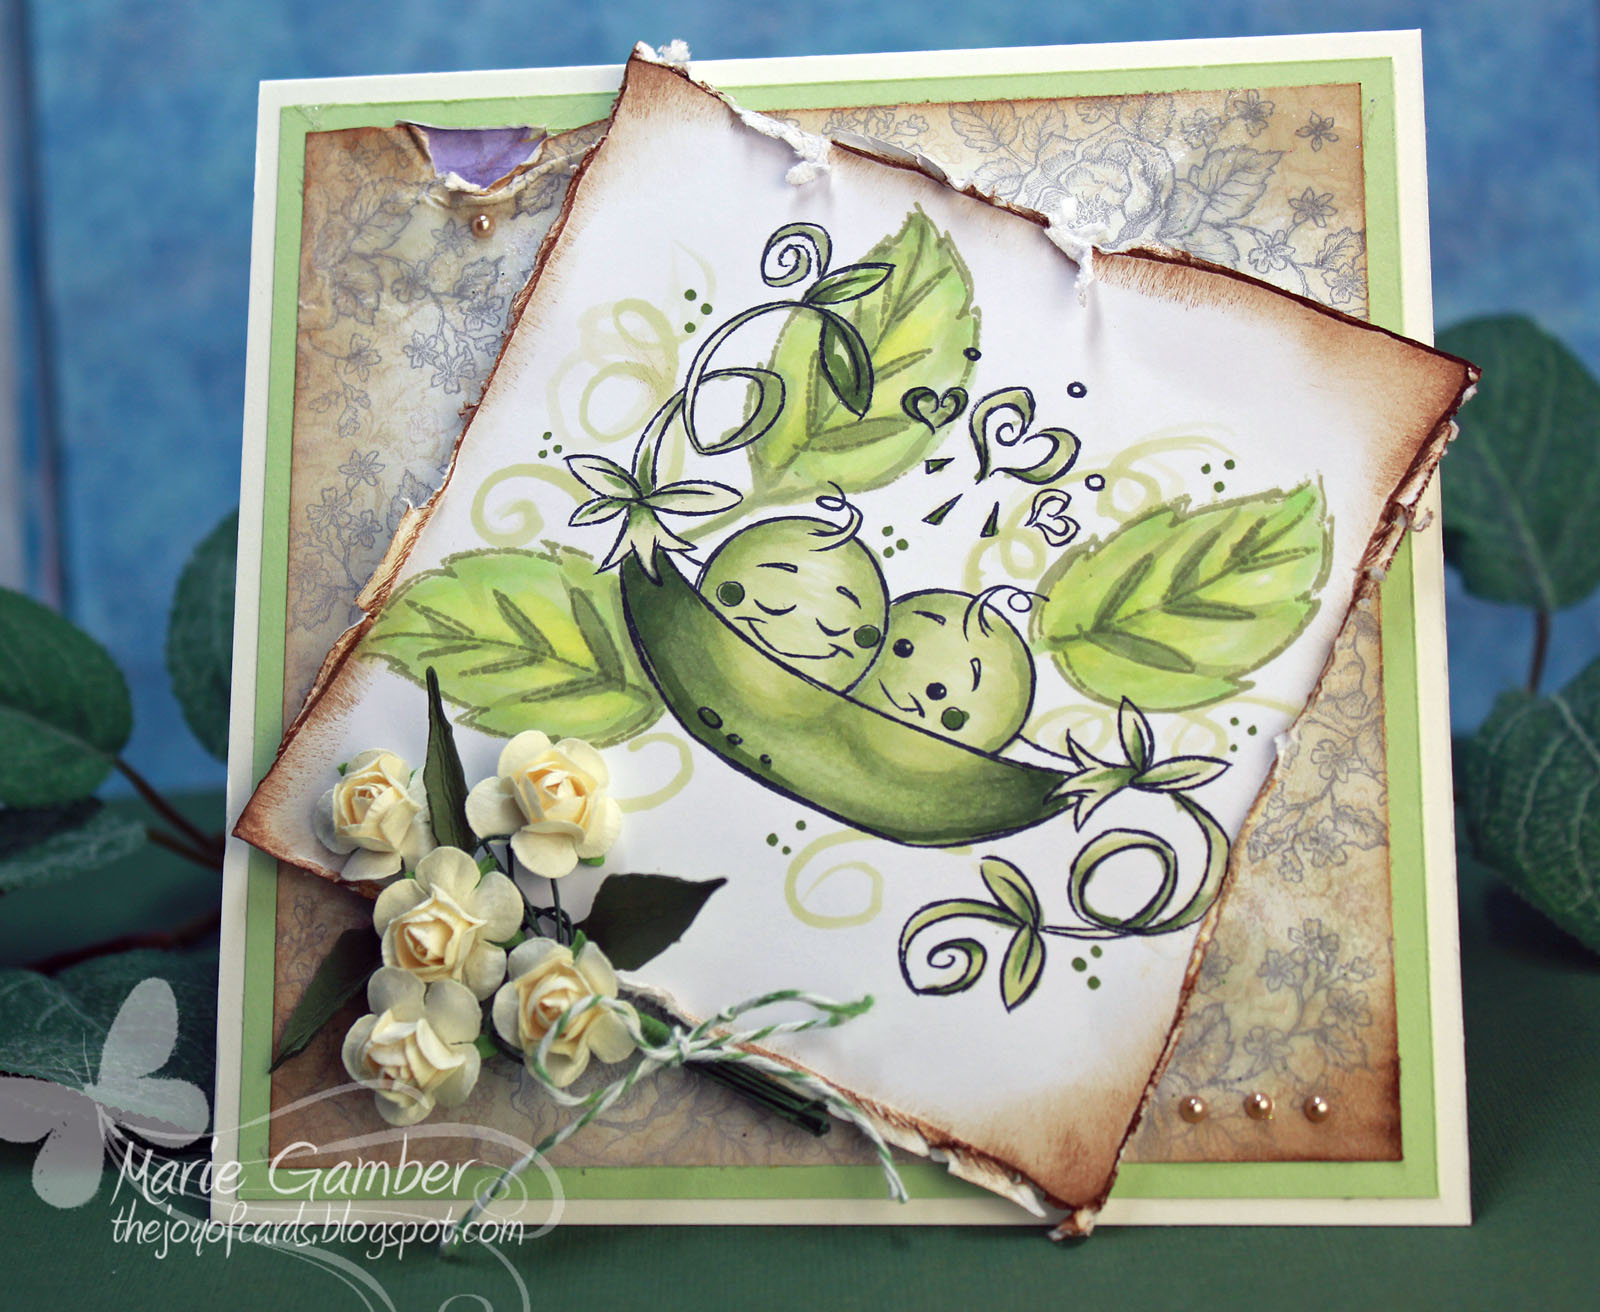
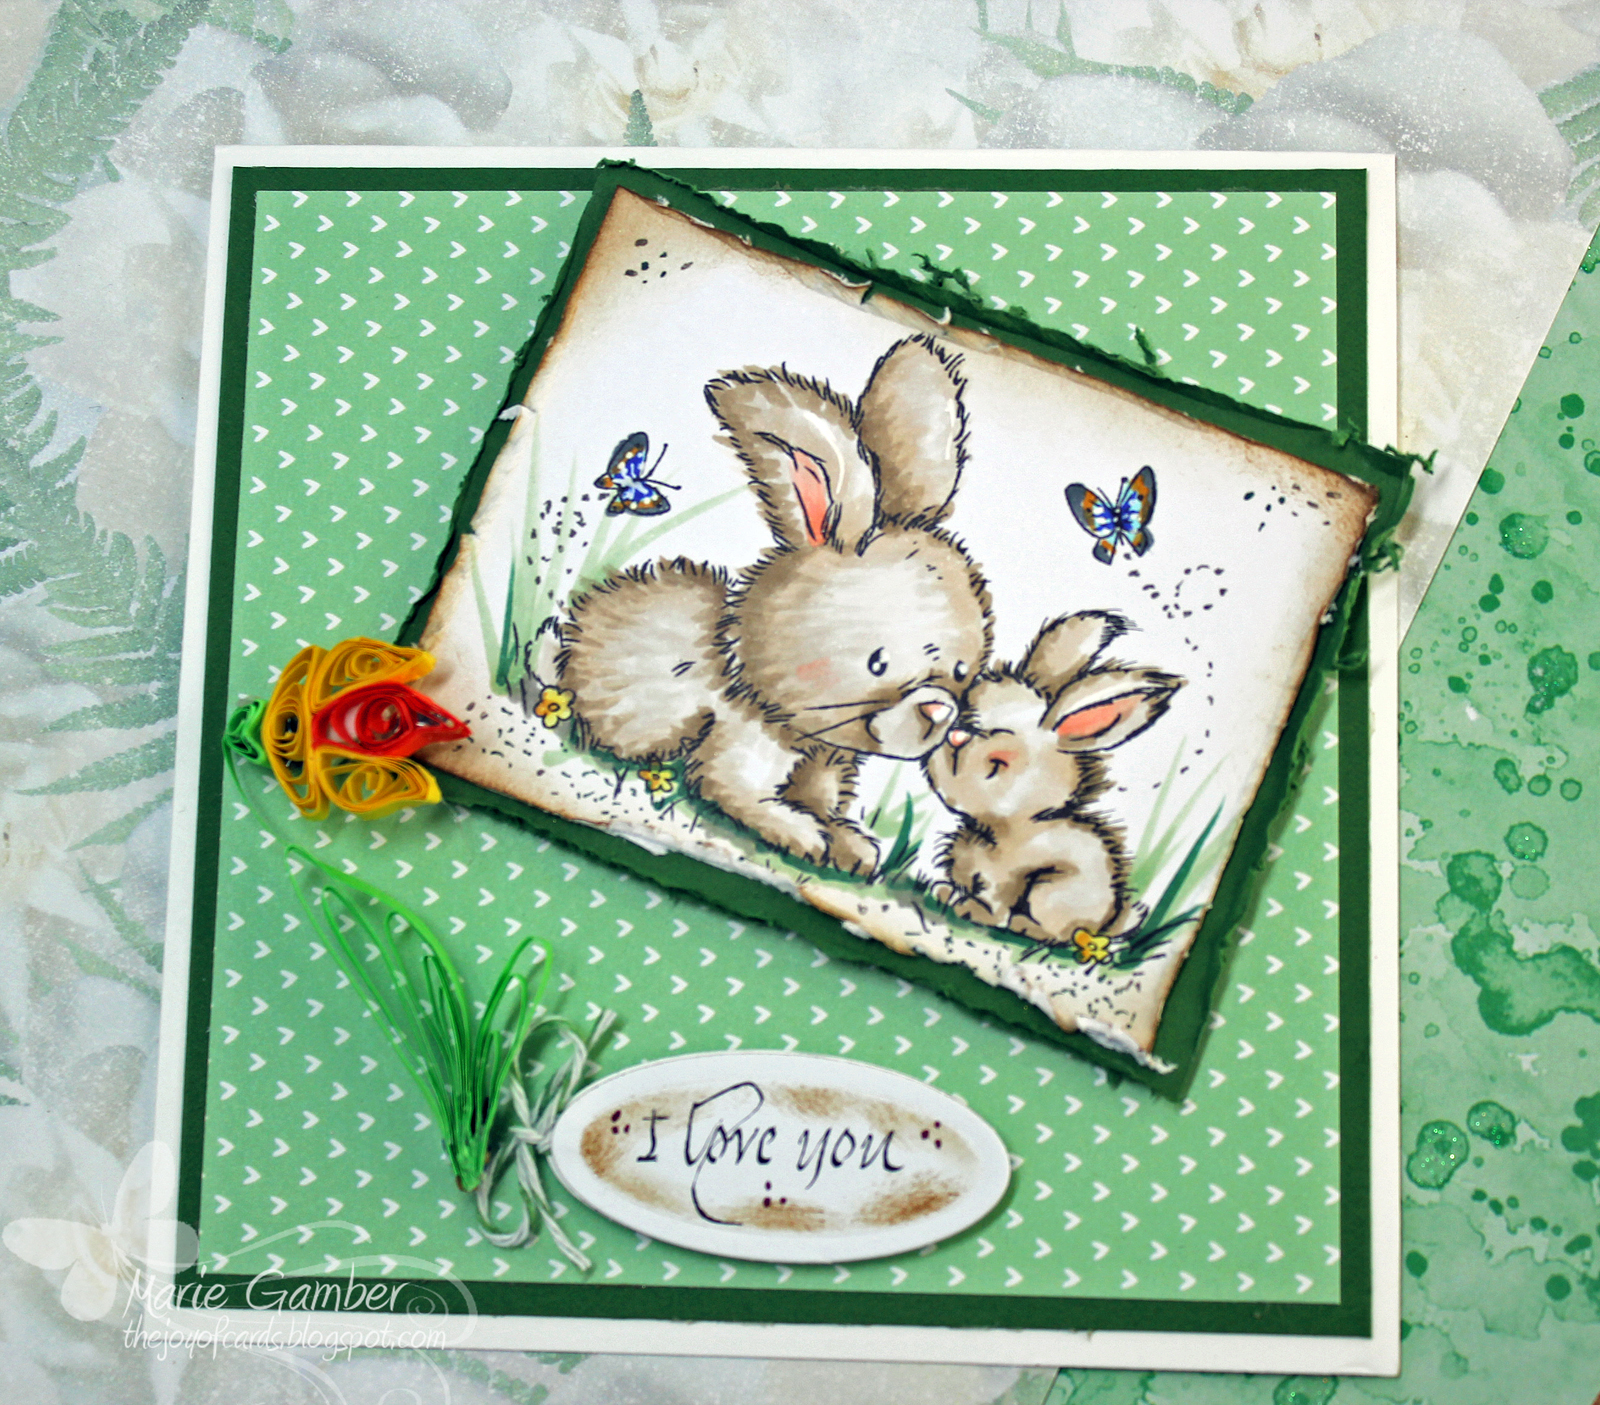
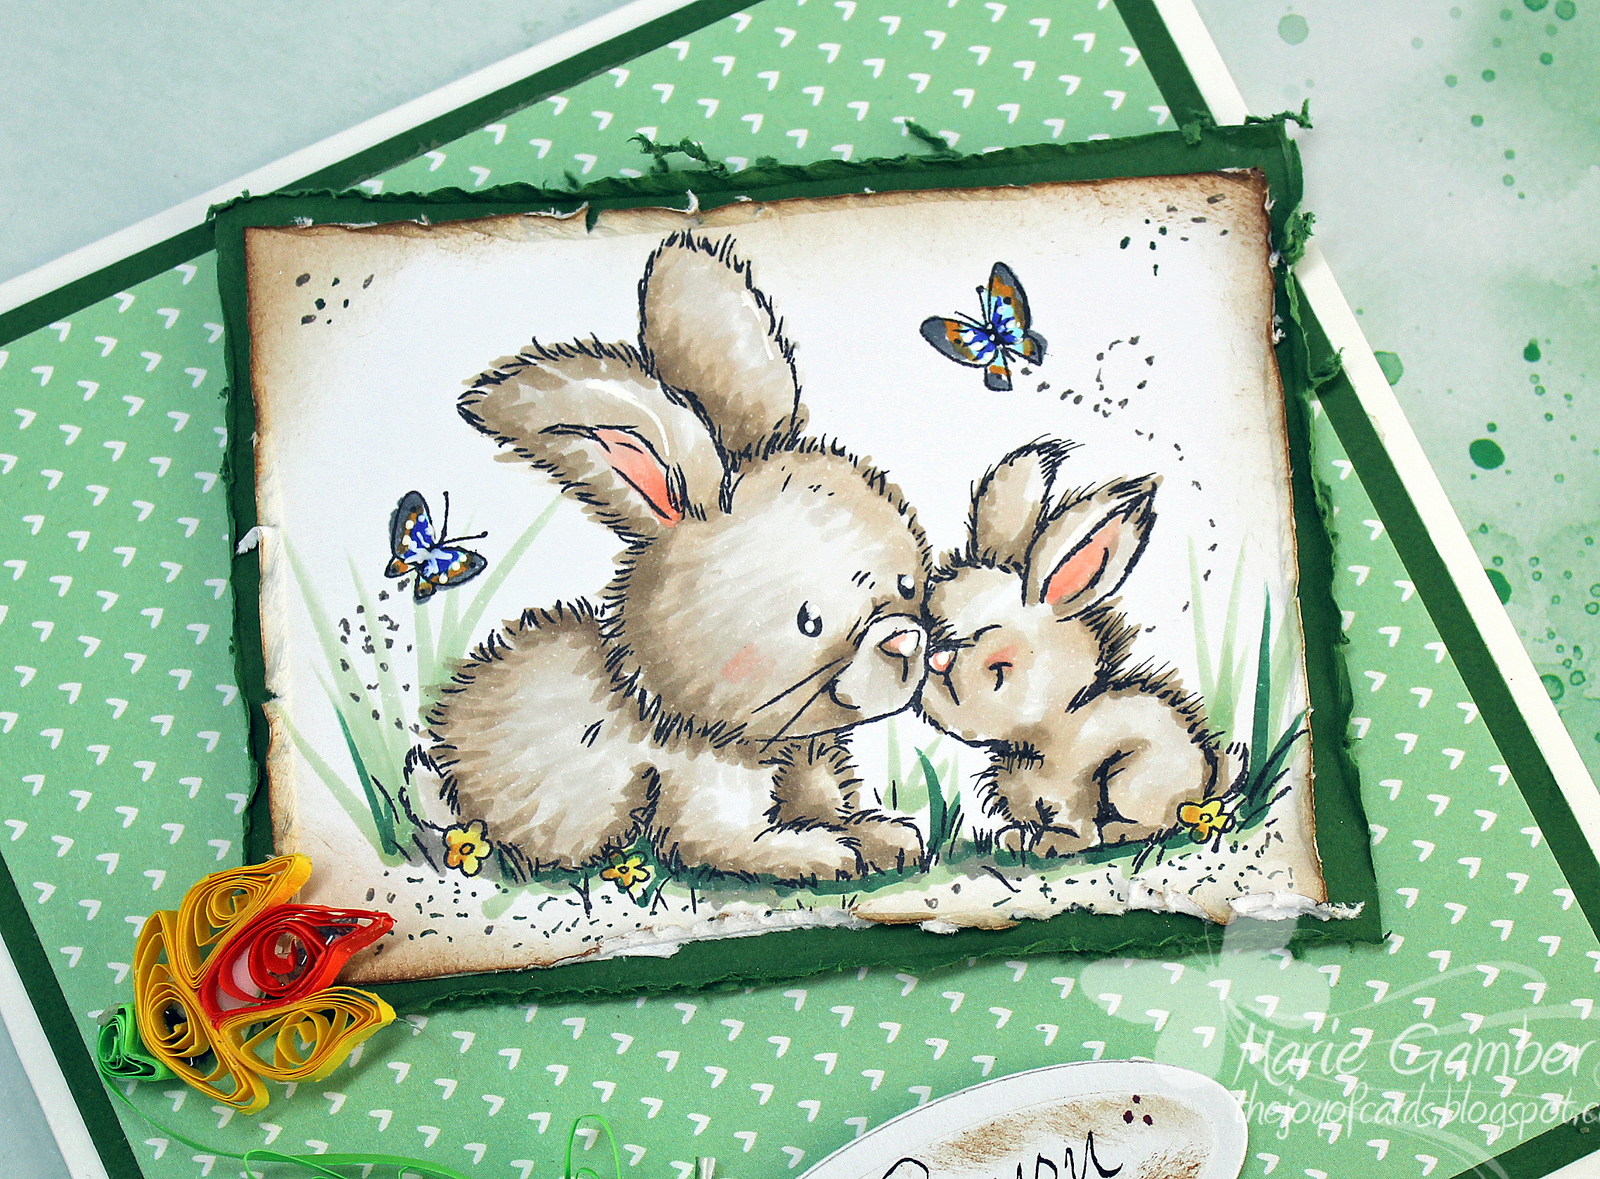
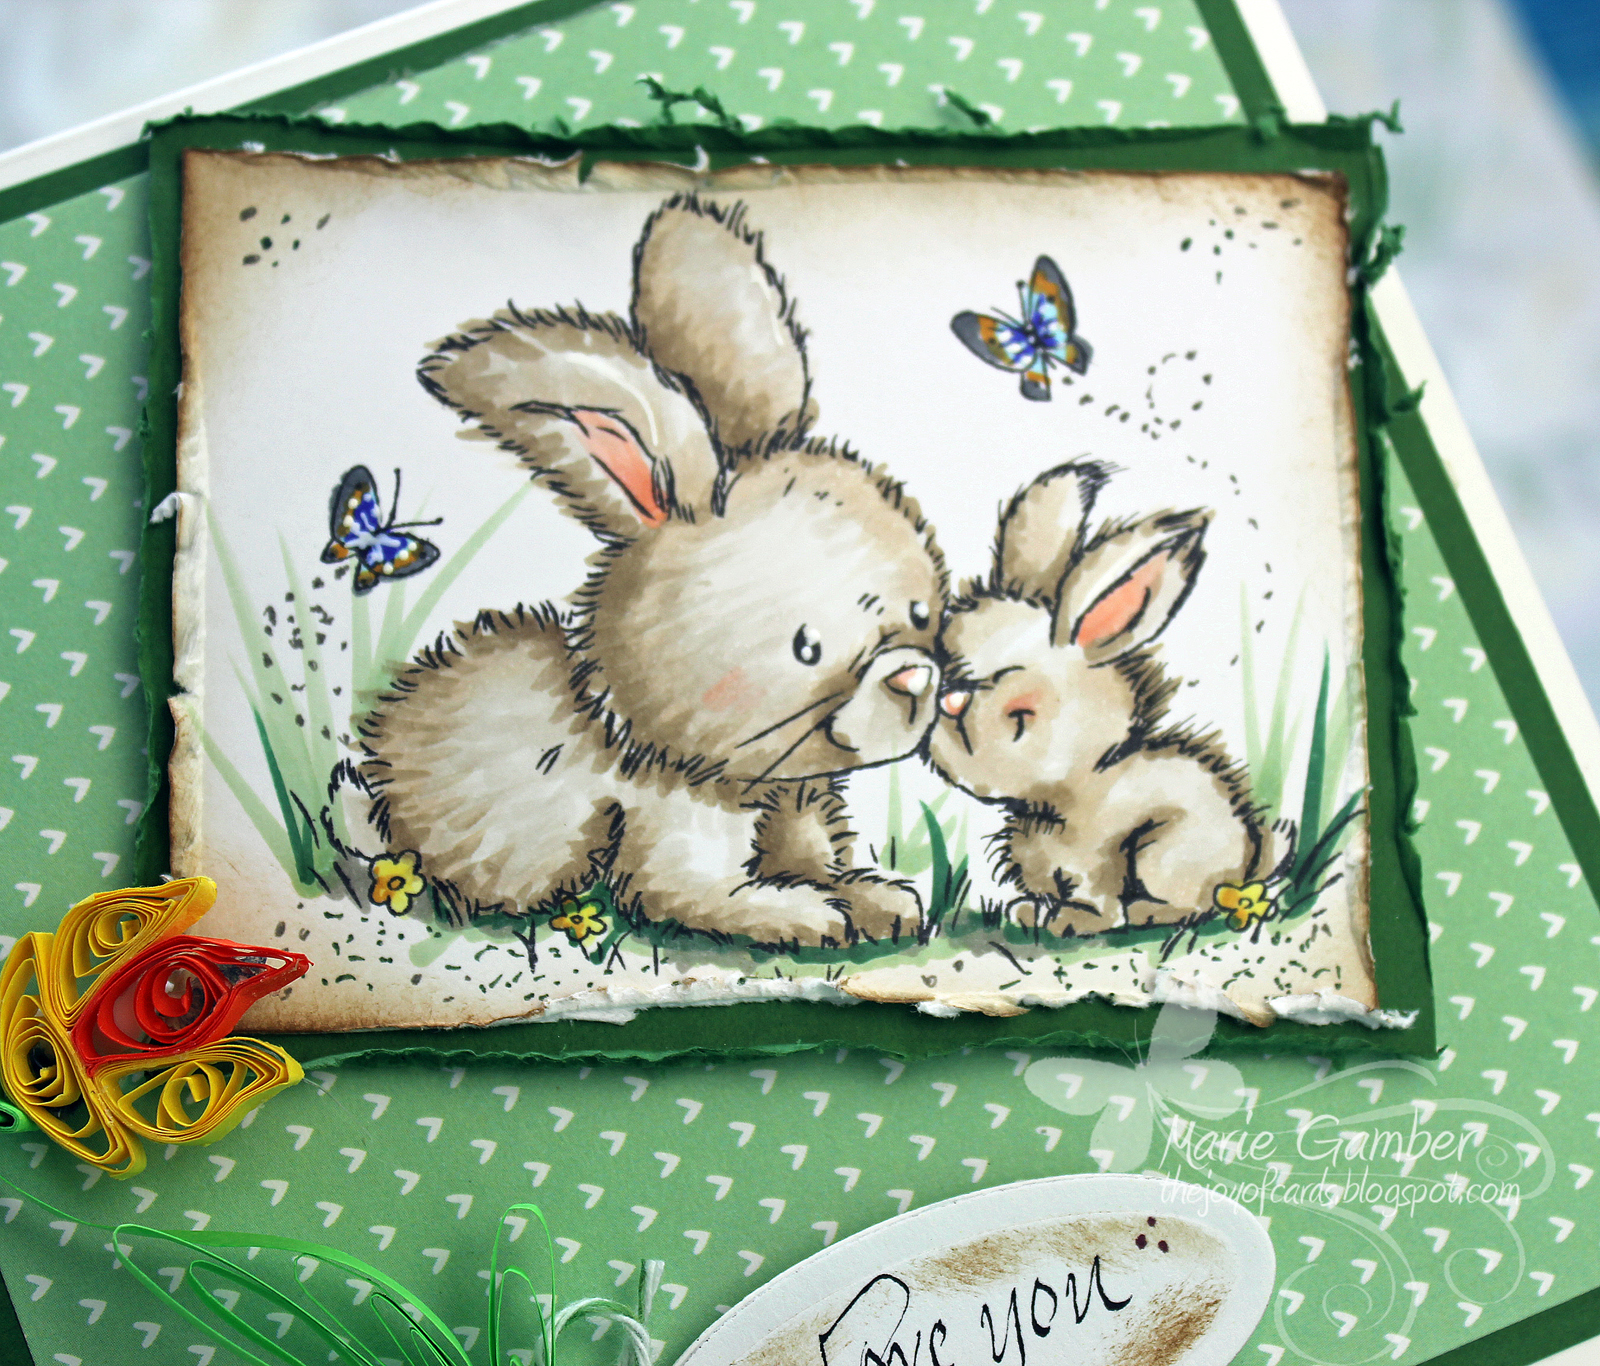
I used the adorable stamp by Tiddly Inks called Berry Sweet.    The image was colored using ShinHan  Twin Touch Markers.   The background was marbleized using watercolors with accents of Copic Opaque White Ink. .  The mushrooms were marbleized using ShinHan  

Twin Touch Color Palette
Hair: BRii, BR100, BR101, BR134
Skin: R139,BR134, YR133
Dress: B63, B66, B64, B67 and BR111, R139
Marbleized mushrooms: B134, GY173, P145, Colorless Blender
Strawbetrries: R2, R15, R14, R13, R28
Shoes: GG3, GG5, Copic Opaque White Ink
Background: watercolor and Copic Opaque White Ink

mp050115a

The base card is Neenah Premium Cover Cardstock 110#,    The base layer is Cotton Candy from Bazzill Card Shoppe. The designer paper was from Little Darlings : Caladium paper pack.   The edges were sponged with Tim Holtz Vintage Photo by Ranger.   

I heavily distressed the  edges of all layers.    Scotch ATG  was used to apply the layers and Pop Dots for dimension for  the Focal Image and Sentiment.   

 Pearls were added for accent.

All in all...... This was a super fun image to color and use for my card!
Thank you for stopping by and I hope you enjoyed the tutorial.


Discover!


The Outlawz: Twisted Thursday has a fun challenge going on and the sponsor is Sherri Baldy!   
I hope you check it out and join in!     


I used an adorable Sherri Baldy Image, colored it up with copics.  
I added Crystal Laquer to the magnifying glass just for fun!    
The butterflies in the background were stenciled and colored with Copic Markers.   

I added a button and butterflies for my  embellishments!  


I hope you stop by and check out The Outlawz: Twisted Thursday Challenge!  

Have a great week and Thank you for stopping by!   
Marie


Friday, April 24, 2015

Sweet Peas in a Pod

mp042415a

Hello and happy Friday!

Marie here with another video tutorial for you. I am going to use the stamp set "Sweet Peas in a Pod" by Whimsy Stamps. I will also use a stamp from Mama Elephant called Freestyle Florals for the background. It's a super sweet stamp and I hope you enjoy it!

 Although I color most of the image in Copics, I also want to support those of you that use ShinHan Twin Touch. I colored the image in Twin Touch as well and will list those Colors as well.

 ***
 You can find some of my other video combos HERE.
  mp042415b

 Stamps
Sweet Peas in a Pod (Whimsy Stamps)
 Freestyle Florals (Mama Elephant)

  Ink
Copic Sketch Marker
Memento Tuxedo Black 
Memento Pistachio
Copic Multiliner 0.03
Tim Holtz Vintage Photo Distress Ink
ShinHan Twin Touch Brush Markers

  Paper
Neenah paper Premium Cover Cardstock 110# Solar White
X-Press It Blending Card
Bazzill Card Shoppe Paper - French Mints Silverton Hall (Wild Rose Studio)

Other
ATG Ranger Mini Blending Tool
Flowers pearls distressing tool
Baker's Twine - Key Lime  

Copic Palette
YG03, YG63, YG67 YG61, G40, colorless Blender, C3

  Twin Touch Brush ShinHan Palette
GY235, GY233, GY237, GY175
  mp0422415c

Thank you so much for stopping by.  I hope you liked my little tutorial!    Have  a wonderful day!


Thursday, April 23, 2015

Color-Ology Hug-able My Besties Bear Rosie Multi Media Canvas - Part 2


Storyline:Have yu ever wanted to get your hands a little messy and just “let go”?    I spend so much time in my head that I think it’s fun to just color or paint without having to  think and plan.   Let’s face it - most of our life is spent planning, organizing and being totally responsible.   Let’s just do some coloring and let our creativity flow!  LOL   

Technique: 
I will be using all types of multi media supplies that I have been looking at for a long time.   It’s time to get out those supplies and start playing!   


Stamp
Hug-Able My Besties Bear Rosie

Ink
Color-Ology Pigment Kit 1
Color-Ology Shimmers
Tim Holtz Distress Ink - Vintage Photo

Paper
Sherri Blady’s Pink Pink Pink Paper pack

Other
Gesso
Home made Mod Podge
Texture paste
Tim Holtz Stencil - Burlap
Work stamps
Glue Gun
Chipboard designs I cut using Heavy Duty Tim Holtz die


Thank you so much for stopping by and I hope you enjoyed the video!    
If you like it, other tutorials can be found on my YouTube channel HERE

Be healthy and give yourself a little TLC by crafting a little every day 


Monday, April 20, 2015

Hug-Able Besties Bear Rosie Sherri Baldy's Color-Ology DT Tutorial


Hello, my friends!

Marie here and I want to share my first video for Sherri Baldy’s Color-Ology DT! 

Do you remember the story of the Velveteen Rabbit?   Remember how he was so loved that his fur was all fuzzy and worn and some of the stuffing was coming out?   Did you have a stuffed animal that you loved like that?    

That’s what I think of when I think of stuffed bears.   I love them!  Yes, even at my age! LOL  Today I want to show you how I created that kind of fur on this adorable teddy bear.    I combine 3 techniques to create a  tight, fuzzy, huggable  texture to fur.    

The stamp is Sherri Baldy’s  Hug-able My Besties Bear Rosie.   I used to E30 natural Blending Family for Copic Markers to color her fur.  E30, E31, E33, E44, E47

The fur was colored using 3 techniques
  • Dimensional Coloring
  • Stippled Technique
  • Texturized with a Colorless Blender


Hope you enjoyed the video!   
Come back soon and be healthy and craft a little everyday! 


For the Love of Tags!

mp042015a

Hello friends!  Marie here with my new project for you!
I love tags!   In my opinion, one can never have too many tags!
Today I will share a tag I created with paper from Paper Temptress and a featured image from
Sherri Baldy's new April release!

pt042915b
The digital image is
Big Eye Big Head Dolls image 577
I stamped the image on X-Press It Blending Card - I love this for my Copic coloring.
It is super smooth and really makes blending a breeze.
The tag base was cut from Grape Jelly Pop Tones.  
I darkened the cardstock to coordinate with my image using Memento Grape Jelly Dye  Ink.
This provided a rich dark color.   I created faux stitching with my Signo Opaque White Pen.
pt042915d
I created the flower using X-Press It Blending Cardstock.
The smooth texture makes it easy to sponge.
My die was Cherry Lynn Black Eyed Susan Strip.
It is amazing how different the flower looks depending on what color you select!
I used Tim Holtz  Dusty Concord Distress ink.
I heavily sponged the center and tips of each petal.
I molded the flower with my McGill molding tools and molding  pad.
A light coat of  Ranger Glossy Accents was applied to the flower after assembly.
The leaf was cut from my stash (love using up my leftovers!)
I sponged the leaves and stem using Tim Holtz Vintage Photo Distress Ink.
pt042015c
This is my finished tag.  I hope you enjoy tags as much as I do!
I love embellish presents and gift bags with colorful tags!
Have a great day and take some time to be crafty!

Marie.Pink

Thursday, April 16, 2015

Stamping With Mega Flakes


Hello tand welcome!

Marie here with a little something different today! I wanted to play with some of the new Mega-Flake Royal Peacock stamping flakes from Indigo Blu!

Come and watch me experiment! :D

***


Other Video tutorials can be found HERE.


Supplies
Stamp Paper
120# card base
 Bazaar Card Shoppe - Blueberry Sour
Gold paper cardstock

 Ink

Other
Mega-Flake Royal Peacock from Indigo BluATG
Flitter Glu by Indigo Leafy Stencil (other stencils)
pearlsstamp cleaner pad
FlowersButterfly punch
Leaf punch and molding pad/tools

  mp041715c

Thank you for stopping by! Hope you enjoyed my experiment! I hope you stay healthy and crafty!


Friday, April 10, 2015

Coloring Longer Fur: Spring Bunnies by Wild Rose Studios

mp040315b

Hello to our wonderful crafting community!   

 Marie here with another mini tutorial for you.

For those of us that LOVE bunnies - it doesn't have to be a stamp reserved for Easter.   There are so  many different occasions to use these sweet images!  The one I am sharing today is by Wild Rose Studio and called Spring Bunnies.    I love the softness of their fur and their sweet faces.   Together, they make it one of my favorite Springtime stamps.


Other video tutorials can be found HERE

mp040315c
Supplies
Other
ATG adheesiveRanger Mini Blending Tool
H
and quilled flower
Distressor
Calligraphy sentiment
mp040315d

Copic Palate
Bunnies:  E40, E41 and bridged E43 with E47E93, E95
Flowers Y11, Y13, YR23
Grass: G21, G29
Butterflies: N5, YR23, B69, Opaque white

I hope you enjoyed this little tutorial.   
Be healthy and happy crafting!