Showing posts with label Singing in the Rain Collection. Show all posts

Tuesday, February 6, 2018

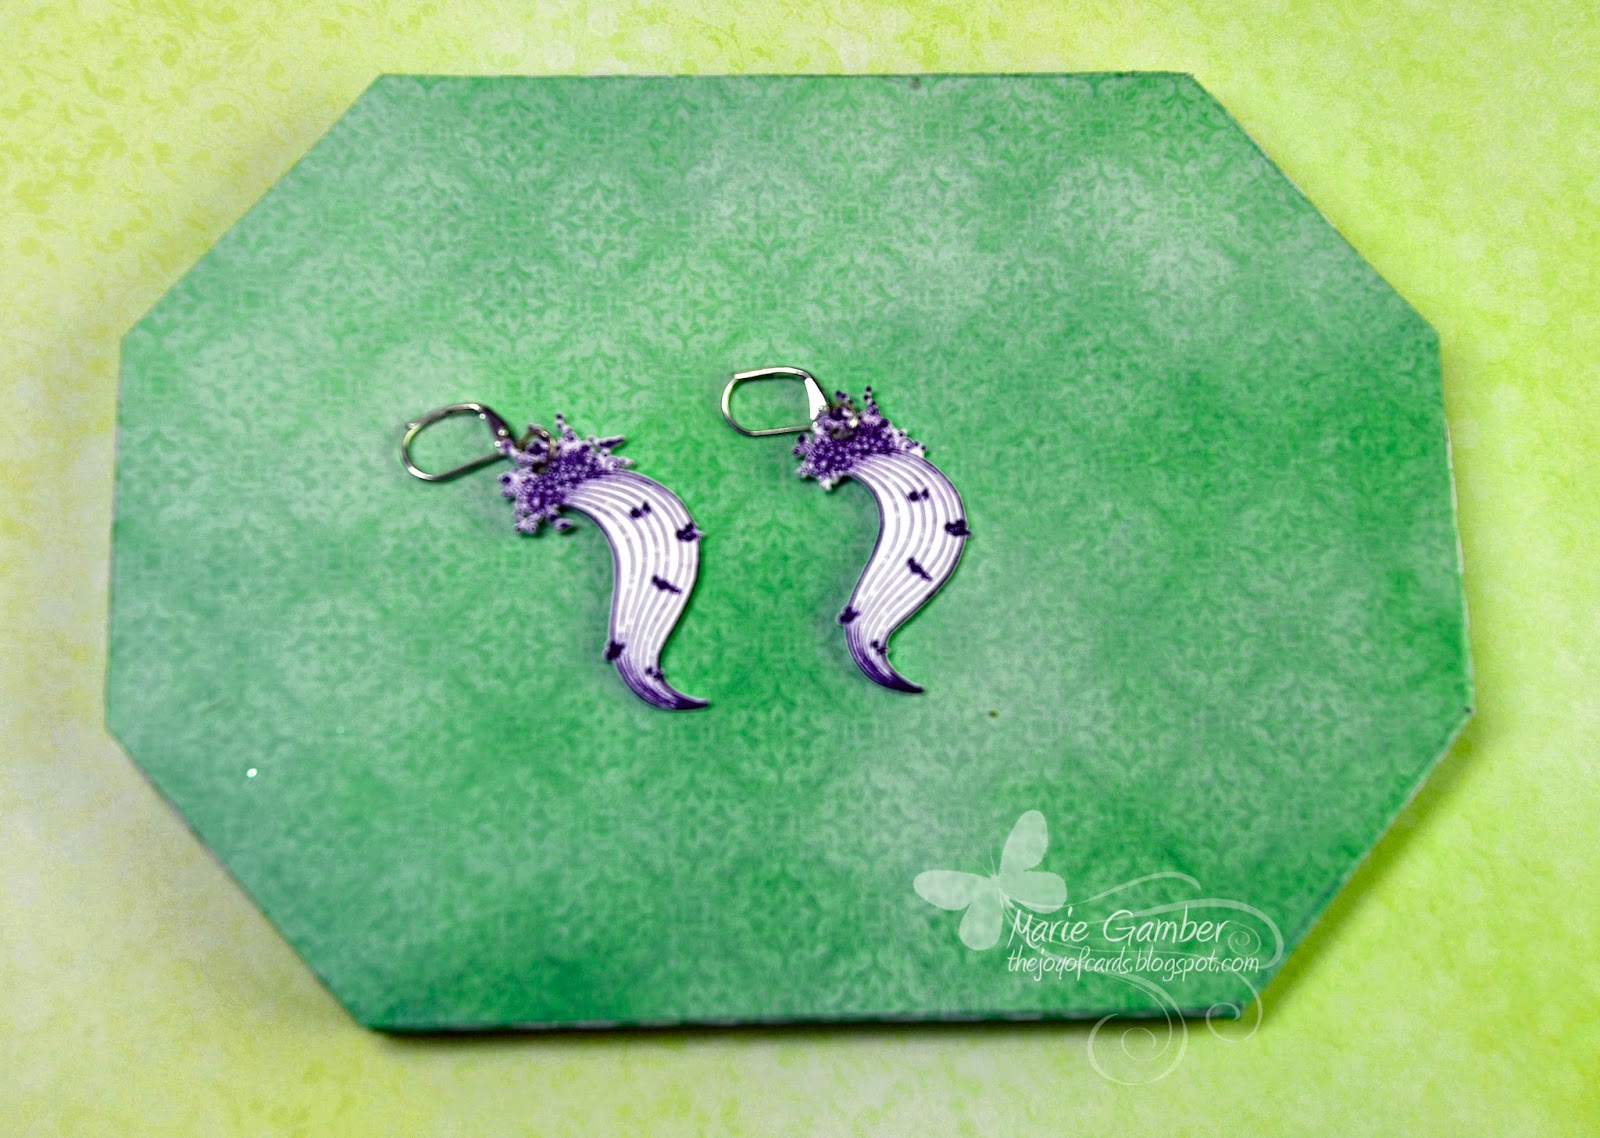
Singing In The Rain Earrings


Hello and WELCOME!    

It's Heartfelt Creations' Inspiration Wednesday!    I wanted to play around with some fun jewelry using  the Singing in the Rain Collection.   I created these easy earrings using Shrinky Dinks plastic product.  When it bakes, it becomes very small.   I selected this particular image because I knew it would shrink to the perfect size!   


HCPC-3809, Singing in the Pain Stamp Set
HCD1-7167,  Singing in the Rain Die
StazOn Permanent Ink Pad - Iris


Shrinky Dinks - Bright White, 2 Leverback earring Findings, 2 oval jump rings, paper punch.


Stamp the image on Shrinky Dinks paper using a  StazOn ink pad. I used Iris.   This is a permanent alcohol-based ink.    Wait a few minutes and allow it to dry.   Die cut the image with the coordinating Singing in the Rain Die.    I used a shim to cut because  I wanted to get a crisp cut through the Shrinky Dinks shinkable plastic.  

Place a paper punch at the center top of the image.  Place the image on a piece of flat parchment paper and weight the ends with rocks to ensure the paper remains flat.   Place the image on a piece of flat parchment paper and weight the ends with rocks to ensure the plastic remains flat during and immediately after the baking process.   Bake at 350 degrees for approximately 3 minutes.   You will know when the image shrinks and lies flat.  


Using two pair of jewelry pliers attach an oval jump ring through the hole  from the paper punch.  Attach the jump ring to the Leverback earring finding on each earring.  Enjoy! 


Singing in the Rain Earrings


Hello, my friends!

I want to let you know that I am going to do some Glob Trotting this year and will not be able to have access to internet for some of my travels.   It is with regret that I have decided to not put my name in the running for our Heartfelt Creations DT Call.   However,  I will continue to use and share my future Heartfelt Creations cards and projects.   As such,  the new team will carry you forward in May and I know their creations will be stunning.   Your vote counts so please take the time and vote!  Your voice is important and you will want to continue to see your favorite designers in the future!  
You can find your link for voting on this page >  https://www.heartfeltcreations.us/blog/662/new-inspiration-with-the-singing-in-the-rain-collection-design-team-call


HCPC-3809, Singing in the Rain  Cling Stamp Set
HCD1-7167,  Singing in the Rain Die
TSSZ11, StazOn Permanent Ink Pad - Iris


Shrinky Dinks plastic - Bright White, 2 Leverback earring findings, 2 oval jump rings, paper punch.


Stamp the image on Shrinky Dinky product  using a  StazOn ink pad. I used Iris.   StazOn  is a permanent alcohol-based ink.    Wait a few minutes and allow it to dry.   Die cut the image with the coordinating Singing in the Rain Die.    I used a shim to cut because  I wanted to get a crisp cut through the Shrinky Dinks shrinkable plastic.

Place a paper punch at the center top of the image.  Place the image on a piece of flat parchment paper and weight the ends with rocks to ensure the plastic remains flat during and immediately after the baking process.   Bake at 350 degrees for approximately 3 minutes.  You will know when the image shrinks and lies flat.  Remove from oven and place a folded piece of paper on the top and gently press to make certain the earrings are flat.  

Using two pair of jewelry pliers attach an oval jump ring through the hole  from the paper punch.  Attach the jump ring to the Leverback earring finding on each earring .  Enjoy!


Tuesday, January 30, 2018

Fairy Gift Box - Singing in the Rain


HCDP1-286, Singing in the Rain Paper Collection
HCPC-3811, Rain Boots and Blossoms Cling Stamp Set
HCD1-7169, Rain Boots and Blossoms Die
HCST1-401, Deluxe Flower Shaping Kit
159723, Designer Dries Clear Adhesive
HCCC2-451, 8.5 x 11 Cardstock, White
352854, Glue Tips - Metal
Pin6, Glue Pins
HCDA1-450, Stack and Store Daubers - Pack of 6
PGM15016, Rajni Chawla's Frosting Powder
TSMP900, Memento Dye Inkpad - Tuxedo Black
TSMP804,  Memento Desert Sand Dye Ink Pad
701079, ColorBox Fluid Chalk Inkpad - Butter
701026, ColorBox Fluid Chalk Inkpad - Lime Pastel
532423-Kit, Sizzix Vagabond 2 With Solo Wafer-Thin Die Adapter


 Vintage Photo Distress Ink, pearls, Copic Markers (Skin Tones - E000, E00, E11, R20,  Hair - C3, C4, C7, C9, Dress/Boots - B00,, B20, B24, B26, B29  Flowers -Y00, Y01, YR00, YR21, YR24, YG20, YG40, YG45), Brad embellishment, Ranger Clear Crackle Paint, Cotton Tail Village SVG file (http://svgcuts.com/index.phpmain_page=product_info&cPath=22&products_id=346), X-Press it Blending Cardstock, heat gun. 


Create the Fairy Cottage Gift Box using the Cotton Tail Village SVG file  Follow instructions for assembly. Adhere the paper with Designer Dries Clear Adhesive.   I used the cardstock from the Singing in the Rain Paper Collection.  I selected colors that were complementary in order to  have a good contrast. 

Sponge the edges of the fairy cottage with Ranger Vintage Photo Ink.  Apply some Crackle paint on the roof of the cottage and sprinkle with Rajni's Frosting Powder.   Heat set.   

Stamp the fairy image on X-Press It Blending Cardstock with  Memento Tuxedo Black Ink.    Color the image with Copic Markers. (Skin Tones - E000, E00, E11, R20,  Hair - C3, C4, C7, C9, Dress/Boots - B00,, B20, B24, B26, B29).  Stamp the flowers with Dusty rose Memento Ink and color with the following Copic Markers (Y00, Y01, YR00, YR21, YR24, Flowers -Y00, Y01, YR00, YR21, YR24, YG20, YG40, YG45).  Gently shape the flowers with a slight curve with the Deluxe Flower Shaping Kit.  

Plan a flower brad on the top of the cottage.   Adhere the fairy and flowers with Designer Dries Clear Adhesive.  

Thank you for stopping by and have a great day!


Tuesday, January 23, 2018

Dimensional Window Card


HCDP1-286, Singing in the Rain Paper Collection
HCPC-3810, Songs of Spring Cling stamp Set
HCD1-7168, Songs of Spring Die
HCD!-754, Eyelet Circle and Basics Small Dies
HCD1-755 Circle Basics Large Dies
HCPC-3752, Classic Rose Cling Stamp Set
HCD1-7110, Classic Rose Die
HCFB1-462, 3D Rose Shaping Mold
HCST1-401, Deluxe Flower Shaping Kit
159723, Designer Dries Clear Adhesive
HCCC2-451, 8.5 x 11 Cardstock, White
352854, Glue Tips - Metal
Pin6, Glue Pins
HCDA1-450, Stack and Store Daubers - Pack of 6
PGM15016, Rajni Chawla's Frosting Powder
173742, Scor-Pal Measuring & Scoring Board
TSMP708, Memento Dye Inkpad - Olive Grove
TSMP900, Memento Dye Inkpad - Tuxedo Black
701079, ColorBox Fluid Chalk Inkpad - Butter
701026, ColorBox Fluid Chalk Inkpad - Lime Pastel
532423-Kit, Sizzix Vagabond 2 With Solo Wafer-Thin Die Adapter


Green cardstock Vintage Photo Distress Ink, Glue Gun, Mini Mister,  Misty, Ranger Clear Crackle Paint, mounting tapem Copic Alcohol Ink Markers. (Skin tone- E000, E00, E11, E24, R20,  Hair - C3, C5,  C6, C8, Dress/Boots - B00, B21, B24, B28, Bird - B000, B00, B21, Branch - E57, E35, Flowers - RV00, RV21, RV34, Leaves - G40, G45 ), X-Press It Blending Cardstock, Squeezed Lemonade Distress Ink.   


Create a 5 1/2 x 5 1/2 inch top folding card from heavy white cardstock.  Cut base layer from green layering cardstock at 5 1/4 x 5 1/4 inches.   Select the green designer paper from  the Singing  in the Rain Collection and cut at 5 x 5 inches.   Adhere the layers and cut a window in the center of the card using Circle Basics Large Die and Eyelet Circle and Basics Small Die.   Cut an eyelet circle for a decorative layer around the window.  Adhere the layers with double sided tape and the eyelet layer around the window with Designer Dries Clear Adhesive.   

Stamp the fairy image from the Songs of Spring Stamp Set on X-Press It Blending Cardstock using Memento Tuxedo Black Dye Ink.   Color the image with Copic Alcohol Ink Markers. (Skin tone- E000, E00, E11, E24, R20,  Hair - C3, C5,  C6, C8, Dress/Boots - B00, B21, B24, B28, Wings - BV00, BV01, RV00, RV 01,  Wings - BV00, BV01, RV00, RV01, Bird - B000, B00, B21, Branch - E57, E35, Flowers - RV00, RV21, RV34, Leaves - G40, G45 ).  Die cut the image with the corresponding die.   

Stamp the rose petals from the Classic Rose Collection using Butter ColorBox Fluid Chalk Ink.  Sponge with Squeezed Lemonade Distress and Lime Pastel ColorBox Ink.  Lightly mist with water using the mini mister and shape using the Rose Molding Plates.   Add additional shaping with the Deluxe Flower Shaping Kit if desired.   Adhere the petals, off-setting each layer.  Adhere them with Designer Dries Clear Adhesive.  Cut the leaves from green cardstock and sponge with Memento Olive Grove Ink.   Shape with the Deluxe Flower Shaping Kit.  Adhere  Ranger Clear Crackle Paint and  lightly sprinkle Rajni's Frosting Powder.  Lightly heat set.   Adhere the leaves and roses around the lower left side of the window with a hot glue gun.    Adhere the fairy image overlapping the upper right side of the window.  Avoid applying the glue gun to the part of the image that hangs over the open part of the window.   

Thank you for stopping by and have a wonderful day! 
Hugs, Maire