Hello everyone!
I am going to share with you today, a technique I learned from Suzanne Dean.
Suzanne is a fabulous Copic Instructor and I refer to her has my Copic Guru. She is one of the first artists I know of that created a technique for Scandinavian-Style Distress Coloring Using Copic Markers.
I will be sharing how I use this Scandinavian-Inspired Distress Inking technique with my Copic Markers. This video will deal with Skin Tones. I will share how I used this technique for clothing on my video next week.
My other YouTube Tutorials can be found HERE
To err is human!I created a super shaker card for you! :) I have lost it! I looked all over and it is no where to be found! Panic? NO! The good news is... I have to re-color it again for next weeks video when I demonstrate this technique for clothing!
Supplies
Stamp
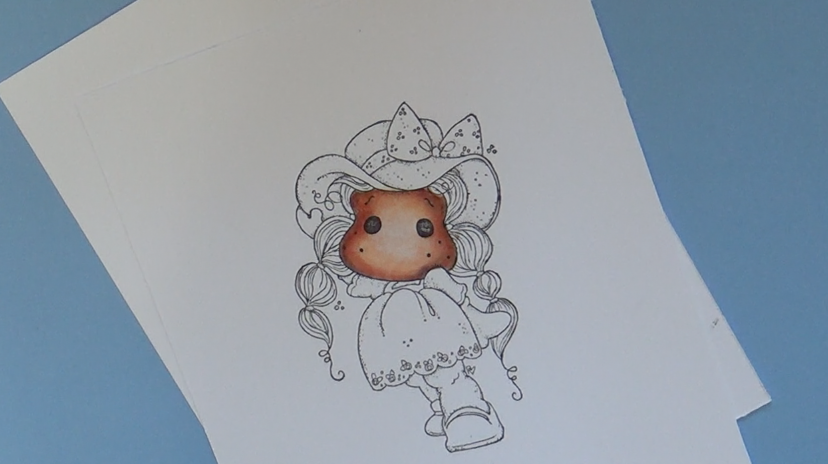
Tilda with Rose Lace Dress (Magnolia)
Any of the wonderful Magnolia images will work well for this technique!!!
There are three main things I will cover of this tutorial.
Scandinavian-Inspired Distress Inking with Copic Markers will
1. Have dark coloration around the edges
2. There will be a warm gray tone that pools around the corners
3. There will be a lot of light -especially in the center.
a. Most images have 2/3 mention coloration.
b. This technique will have 2/3 light coloration.

I applied E13 in the shadow area. The darkest shadow area was applied around the perimeter of the face , hairline and round the top of the shoulder.

The midtown was applied sparingly from the inner edge of the E13 with a light flicking motion. This should be used sparingly. Usually, the mid-tone constitutes 2/3 of the image. With this particular distressing technique, 2/3 of the image remains .
The midtown was applied sparingly from the inner edge of the E13 with a light flicking motion. This should be used sparingly. Usually, the mid-tone consitutres 2/3 of the image. With this technique, 2/3 of the image will remain "light" in color.
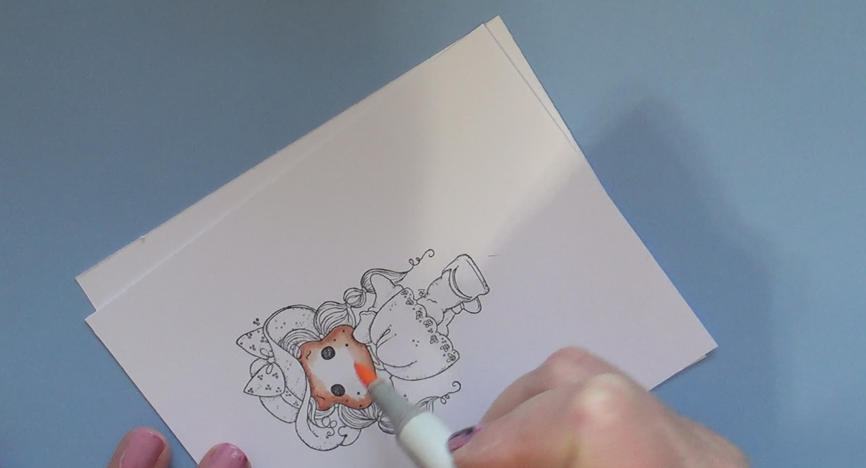
E00 was applied as my highlight. Notice that with this technique, I am not coloring all of the highlight at once!
Even though a color is light in color, the ink will lay down another layer of partials and the color will darken :D

I now go back and apply W3 in the corner areas to allow a warm gray color to pool.
I then top it with E13 and blend out with E11, E00. I clean off the nib of my E00 and then lightly flick across the center once with a light touch.

I lightly flicked from the center out with my Colorless Blender. It is important to use a very light touch and use this step very sparingly to avoid the color from becoming blotchy. You can choose to omit this step if you prefer.
I hope this tutorial was helpful and that I clearly covered the 3 important points that help create this Scandinavian-Inspired Distress Inking Technique with Copics!
- Have dark coloration around the edges
- There will be a warm gray tone that pools around the corners
- There will be a lot of light -especially in the center.
- Most images have 2/3 mid-tone coloration.
- This technique will have 2/3 light coloration.
Thank you so much for stopping by! I will be back next week with how I use this same technique to color the clothing!

Another new technique from you. Thanks a bunch. I'll have to give this one a try very soon.Have a great day.
ReplyDeleteThanks Donna! I fixed the video LOL It will now play!
ReplyDeleteHugs,
Marie
Great technique!! I always enjoy your videos, Marie!!
ReplyDeleteWonderful video wanted to tell how much I liked how you displayed your color numbers. That was a super idea. Hope things are good with you?
ReplyDeleteAwesome video, and I will find your card, if you find my cutter bee tweezers...lol..
ReplyDelete