Sunday, October 23, 2011

A Magical Land


Good morning to all of you!    I am so excited.  I have just been invited to serve on the fabulous  Creative Team for  Nicecrane Designs.  I have always been impressed by the images designed by Ignacio Molina.  His work is gorgeous!  His blog can be found HERE.   This is the first card I created as a new Creative Team member for Nicecrane Designs.   His wonderful images and graphically designed background images can be found at  Nicecrane Designs.   Stop by and check out all his images!  You will be in for a treat!


These gorgeous images for his Adorable Alice series can be purchased at Nicecrane Designs.   You may also enjoy Ignacio's wonderful blog that can be found at  Nicecrane Designs Blog.


I selected this adorable little rabbit from the Alice in Wonderland Series.   Isn't he just adorable?  

Techniques:

  • Copic Alcohol Markers
  • On Paper blending
  • Tip to Tip Blending
  • Digital Image


Supplies:
Stamps:
Adorable Alice II/Alice in Wonderland Digital Image (Nicecrane Designs)

Paper:
Pure Luxury White Cardstock (GKD)
Cryogen/focal image (Curious Metallic)
Designer paper
Blue Cardstock (unknown color) (Bazzill)

Ink:
Copic Alcohol Ink (Too, Inc.)
Memento New Sprout Dye Ink (Tsukineko)

Other:
Computer, printer and software to edit picture size
Paper trimmer
Scor-Buddy (Scor-Pal)
Adhesive
Cuttlebug (Provo Craft)
Small and Large Petite Oval Nestabilities die (Spellbinders)
Jumbo Sponge Daubers (Tsukineko)
Hand crafted roses from card stock
Doohickey flourish die (Magnolia)


Copic: YR23, Y21, Y11, Y0000


B28, B26, B24, B21, B0000

Vest: G29, YG63, G40
Fan: G29, YG63, G40, C0, C1, C3
Rabbit: E50, E53, E55, R20
Die:  Petitie Oval Nestabilities.  Cut then embossed.   
Sponged:  Memento New Sprout Dye Based Ink


Focal Image Mat:   Petite Oval Nestabilities with Blue Cardstock to mach the blue color in the coat.


I created roses and leaves from card stock.   

Click to enlarge

The card was assembled and stickler were placed on the leaves and flourishes.

I hope you enjoyed this card.  I had a great time using these wonderful little images!  Thank you so much for spending some time with me!

Hugs,
Marie

Wednesday, October 19, 2011

Harvest Moon

Click image to enlarge


Color Me Creative is having their Halloween Challenge and it is going on now here!  The card needs to be a halloween theme and you need to use orange!  Doesn't that sound fun!

Stephanie at Glitterbabes is sponsoring this challenge.   
The prize from our sponsoris a $10 Gift Certificate to spend at her store

and 1 pack of Cryogen Cardstock  
In addition, 

Each month Suzanne will take EVERY CMC Challenge Entry for that month and pick a random winner!  That winner will win a $50 Gift Certificate to Oozak.com! 
So we will have 1 Challenge Winner for EACH Challenge (prize listed below each challenge)AND 1 winner from all that month's challenges to win the Oozak Gift Certificate!  Two ways to win, but you gotta play!!

I selected this cute little image for my Design Team card.  It is  called Harvest Moon from Stephanie at Glitterbabes.  Isn't it such a cute image?   That should jump start my Halloween Spirit!   


Techniques:
  • Copic Alcohol markers
  • Reflections
  • On paper Inking

Personal challenge:   I decided to try to practice "reflections".  I wanted to have  the moon and sky reflect on my image.   


Finished Card Size: 5.5” X 4.25”

Supplies:
Stamps:

  • Harvest Moon Digital  Image (Glitterbabe)
  • The Light and The Sea Set (Stampscapes Inc.)

Paper:
Pure Luxury White Cardstock (GKD)
Pure Luxury Pumpkin Spice Cardstock (GKD)
Midnight Blue color of cardstock from my stash (Bazzill)
Cryogen (Curious Metallic)

Ink:
Copic Alcohol Ink (Too, Inc.)
Memento Summer Sky (Tsukineko)
Memento Paris Dusk (Tsukineko)
Gold Atyou Spica Pen (.Too, Inc.)

Other:
Computer, printer and software to edit picture size
Paper trimmer (Fiskus)
Scor-Buddy (Scor-Pal)
ATG Adhesive (Scotch)
Jumbo Sponge Daubers (Tsukineko)

Embellishments:
Amber Rhinestones
Crystal Stickles (Ranger, Inc.)

Measurements:
8.5  x 11 in.  cardstock at 4.25 in (vertical landscape).  This will produce one 4.25 x 5.5 in. pieces.  You will only use one piece of cardstock. Score at 5.5 in. (Fold at top)
Base Layer: 4 x 5.25 in.
Focal image: 3.5 in. x 3.75 in
Focal Layers 3.3.625 in x 3. 875 in and 3.75 in x 4in.  


Copic Alcohol Ink Markers:  
  • Pumpkin:  YR18, YR16, YR14, Y17, Y21, Y02, Y000, Y0000, touch of B000
  • Leaves G28, YG63, G40
  • Hat: C9, C7, C5, C3, C00, Y000.  I also used a small amount of B69 at the darkest on my shadow area.
  • Harvest Moon: YR16, Y17, Y000, Y0000 and a small amount of B000
I hope you take time to join us a Color Me Creative Challenge.  We always have a lot of fun!

 Thank you for taking the time to few my card!

Hugs,
Marie


Tuesday, October 11, 2011

Want to Copic Like This? Me Too!


This was created by Suzanne Dean, who has been my Copic instructor for a year and a half  now at Color Me Creative Classroom.  I consider her my "Copic Guru!".   I will have the opportunity to take a basic/intermediate class and an advanced class from this wonderful woman October 22nd!   I am over the moon!   

Suzanne will be offering classes in the San Jose, CA area (Campbell, CA)  on October 22 & October 23rd.   Please sign up and join in the fun!  I would love to see you there!
Check out the links below for more information!!!

Want to get in on the Copic Marker Craze

Want to learn how to master, use & love these
markers?


**Take a Class from Instructor Suzanne J Dean**
Suzanne has been using and teaching about Copics for 3 years
and runs a successful Online Copic Classroom and is taking her classes on the road!
She is also a freelance designer for many craft companies around the world!
Check out her online classroom and blog to find out more info about her and see her work:

Color Me Creative Classroom:   www.scrapbitzcopics.ning.com
ScrapBitz Blog:  www.scrapbitz.blogspot.com


See you there!

Hugs,

Marie

A Moment to Remember

A Moment to Remember

Stamper's Quest  is an online magazine that is filled with wonderful tutorials that specialize in cards or crafts made with rubber stamps or digital stamp images.  The magazine's theme for October is "Monochromatic Magic".   I created this card using Sepia Tone on Tone Copic Alcohol Markers.

Since this card was created for the e-magazine publication, I cannot share the tutorial on my personal blog... however, you can find it Here

For some wonderful monochromatic cards and tutorials check these out!


Take the time to stop by and view everyone's tutorials.  I think you will be impressed!
Thank you for spending some time.  Come back soon!

Hugs,
Marie

Thursday, October 6, 2011

Tilda in Winter Night : Distress Inking


I am so sorry for the delay in posting.  I worked an extra  5 days and then found myself without wifi or any internet connection for a few days.  My connection is back up and running.... YAAA!   

Oh my...   Color Me Creative has grown!  Not only are we getting more and more wonderful new members... We have increased the number of  our design team members!  Our Junior Design Team joined our Senior Design Team and now we have some wonderful new Junior Design Team members.   Look on the sidebar and your will have a link to their wonder blog sites. I know you will be in for a treat!

Color Me Creative has a new challenge with the focus on distress inking with Copic  alcohol markers.   I just love to use the technique of distress inking.  It is a  technique I learned in  Suzanne Dean's Color Me Creative Classroom Class 3 Video 14.   This technique gives a watercolor effect and you will notice there is a lot of white space.   It is a technique frequently used by Scandinavian artists. Do you think trying to perfect this technique would be a good excuse to travel abroad? LOL!  It is work a try!    Check out this technique and join in the fun for the  Color Me Creative Challenge: Distress Ink Effects Using Copic Markers! 


Challenge:  Distress Effect Using Copic or ProMarkers 
No back linking allowed!

Sponsors: 
The Prize for the winner of this challenge (randomly chosen) will get:
3 Magnolia Stamps of their choice from Magnolia-licious
and 
1 pack of Cryogen Cardstock
  
All challenge participants will have the opportunity to have their name in a drawing for a $50.00 Gift Certificate!!!!

Technique:
  • Distress Inking
  • Copic Alcohol Markers
  • Masking
  • Sponging
Stamp:
Tilda in Winter Night (Magnolia-Licious)
Tree Silhouettes (GKD)

Paper:
  • Cryogen (Curious Metallic)
  • Pure Luxury In the Navy (GKD)
  • Pure Luxury Little Boy Blue (GKD)
  • pure Luxury White (GKD)
Ink
  • Copic Alcohol Ink Markers (.too, Inc.)
  • Memento Summer Tuxedo Black (Tsukineko)
  • Memento Summer Angel Pink (Tsukineko)
  • Memento Summer Summer Sky  (Tsukineko)
  • Memento Summer  Dandelion (Tsukineko)
Copics
Coat and Socks: B04, B02, B000, C3, Colorless Blender
Bench and shoes: E49, E44, E40, Colorless Blender
Hair and lantern  :  E37, E34, E30  add y02 and Y000 for Flame  and flame shadow
Skin Tones:  E000, E00, E02, R20
Shadows under bench:  C3

I hope you enjoyed this card.  Join in on the fun and I hope to see you at Color Me Creative!

Hugs,
Marie

Monday, September 26, 2011

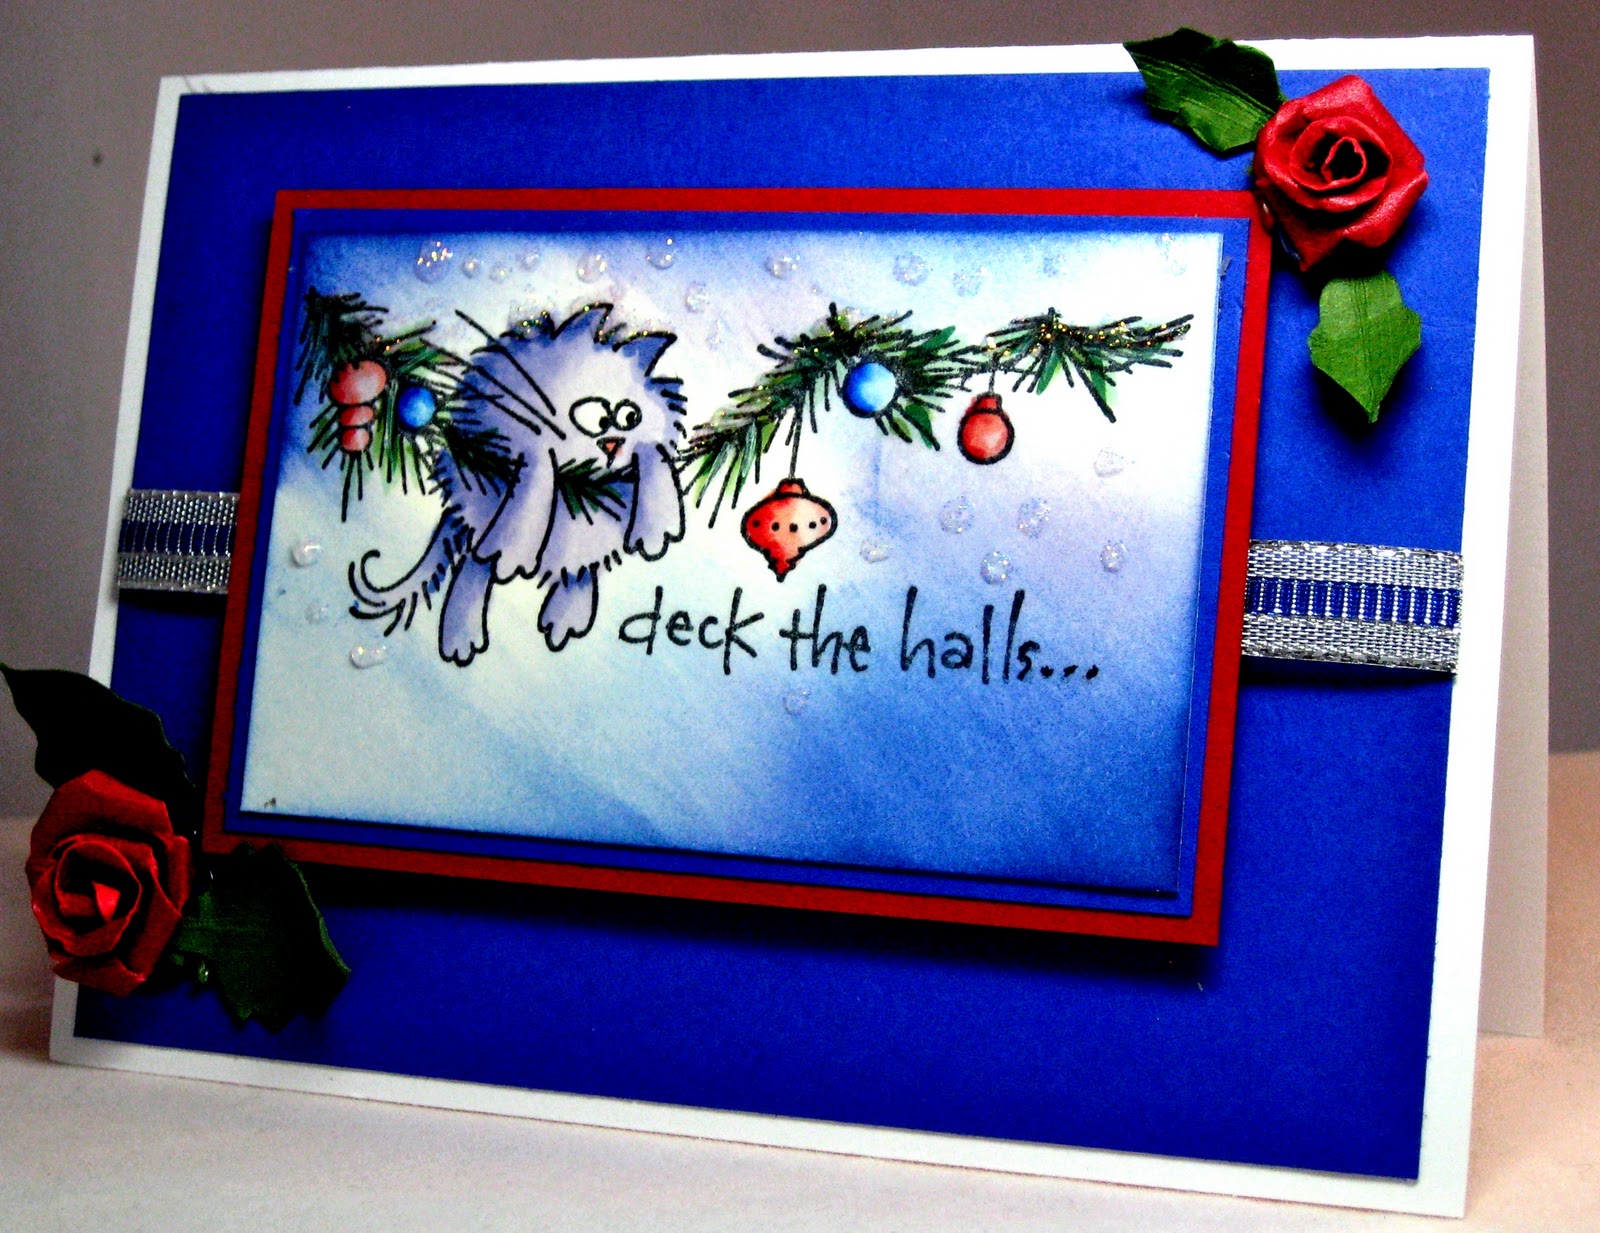
Deck The Halls...

Hello to all my cyber friends!   It's Monday and I hope everyone had a fabulous weekend!  I worked a lot of extra 12 hour shifts in the Emergency Department last week and had a good sleep and I am ready to hit my craft room....   That's how I roll! LOL

Copic Creations has a fun challenge going on right now.  Challenge #58 is an opportunity to have fun with those Copic markers!  The challenge is:  FUR WITH A TWIST!.  See what you can come up with...  I had a lot of fun creating  this card for the challenge.


Click to picture to enlarge image. 

Technique:
  • Copic alcohol markers
  • Tip to Tip Inking
  • Direct to paper inking
  • Sponging
  • Paper Quilling (Roses)

Finished Card Size: 5.5” X 4.25”

Supplies:

Stamp:
Fluffles the Cat (Stupendous)


Paper:
Pure Luxury White Cardstock (GKD)
Pure Luxury Lipstick Red Cardstock (GKD)
(Focal Image) Cryogen (Curious Metallic)
Violet lightweight cardstock (From my stash)
Pure Luxury Fresh Asparagus Cardstock (GKD)

Ink:
Copic Alcohol Ink (Too, Inc.)
Memento  Tuxedo Black (Tsukineko)
Memento  Summer Sky (Tsukineko)
Memento  Angel Pink (Tsukineko)
Memento  Paris Dusk (Tsukineko)

Other:
Paper trimmer (Fiskus)
Scor-Buddy (Scor-Pal)
ATG Adhesive (Scotch)
Jumbo Sponge Daubers (Tsukineko)
Tim Holtz Tonic Scissors 
Glue
Clear adhesive dots (Zots)
Opaque white pen (Inkssentials)

Embellishments:
Metallic Ribbon (From my stash)
Diamond Stickles (Ranger Inc.)
 Slotted Quilling Tool to make Roses/leaves from regular card stock

Measurements:
Cut  a 8.5  x 11 in.  cardstock in landscape position.   This will produce one 4.25 x 5.5 in. pieces.  You will only use one piece of cardstock.
Base Layer: 4 x 5.25 in.
Focal layer: 3.5 in. x 2.25 in. 
Violet focal base: 4in x 2.75 in. 
Red focal vase 3.75 in x 2.5 in.


Copic Markers
Cat with a "TWIST" : BV0000, BV000, BV01, BV04 and R20 to nose.
Garland: G12,YG63, G28, (Highlighted with Opaque White Pen)
Ornaments:  R0000, R20, R22, R24 and B0000, B00, B02, B04

In this card, I used reglualr cardstock for the roses and Leaves.  I created them with scissors and scissors.  I will save that tutorial for another day! LOL!

I hope you enjoyed this card as much as I enjoyed creating it for this fun challenge!

Thank you for stopping by and please come back soon!

Hugs
Marie 

Wednesday, September 21, 2011

Black and White Tone and Sepia Tone


Black and White Tone


Hello everyone!   I created two Design Team cards for the new CMC challenge.  Join in the fun at Color Me Creative Challenge!  Challenge # 27 will run until September 30th so you have some time!

Your challenge this time is all about

Olde Tyme Photo!!
That means you have to use sepia or black/white colors on your image
WITH
1 small POP of color!!


Dust off  YOUR COPICS, COPIC REFILLS OR COPIC AIRBRUSH SYSTEM (Or ProMarkers if you have them)
to color any image of your choosing but it must be

** SEPIA TONES or BLACK-n-WHITE
WITH A POP OF COLOR!!**

Suzanne Dean suggests the following for Good Copic Colors to use:
Warm Grays or Cool Grays for Black-n-Whites
Sepia Tones-- E44,E43,E42,E41 & E40

Double your pleasure!!!!!  There are two, yes two ways to win!
The Prize for the winner of this challenge (randomly chosen) will get:


** a $20 Gift Certificate to Susana's Custom ARt and Card Designs


In addition,  each month every CMC Challenge Entry will be entered into a monthly random drawing.  That winner will win a $50 Gift Certificate to Oozak.com!!!


Black and White Tone
C9, C7, C5, C3, C1 C0, R20 R39
Technique: 
  • Black and White Tone
  • On Paper Inking and Tip to Tip Inking
  • Sponging
  • Masking

Paper:
  • Cryogen (Curious Metallic)
  • Pure Luxury Black Onyx (GKD)
  • Pure Luxury Moonlit Fog (GKD)
  • Pure Luxury White

Stamp:  
  • Winter Wings rubber stamp / Illustrated Asela Hopkins (GKD)
  • Tree Silhouettes (GKD)


Ink:
  • Copic Alcohol Ink Markers: C9, C7, C5, C3, C1 C0, R20 R39
  • Memento Tuxedo Black (Tsukineko)
  • Memento London Fog (Tsukineko)
  • Opaque Pen (Inkssentials)


Embellishment:

  • Ranger Diamond Stickles (Ranger, Inc)


Sepia Tone
Copics: E44,E43,E42,E41 & E40 R24, R22, R20


This is another card I created using Sepia Tone.   I really enjoy the vintage look and find it to be one of my favorite techniques.    

Technique:
  • Sepia Tone with a Color POP
  • Distressing


Image:  Bottles by Ek Success Brands (Inkadinkado)

Ink: 
  • Memento Tuxedo Black (Tsukineko)
  • Tea Dye Distress Ink (Ranger, Inc)
  • Vintage Photo Distress Ink (Ranger, Inc.)
  • Copic Alcohol Ink Markers (.too. inc)
Paper:
  • Cryogen (curitous Metallic)
  • Pure Luxury White (GKD)
  • Pure Luxury Chocolate Kiss (GKD)
Embellishment:
5mm Metallic Sticker Nailheads (Mark Richards)

I hope you enjoyed these cards.  Take out those Copic markers and give this technique a try.  

Thank you so much for taking some of your day to stop by and spend some time.  I really appreciate your visit!

Hugs,
Marie

Tuesday, September 13, 2011

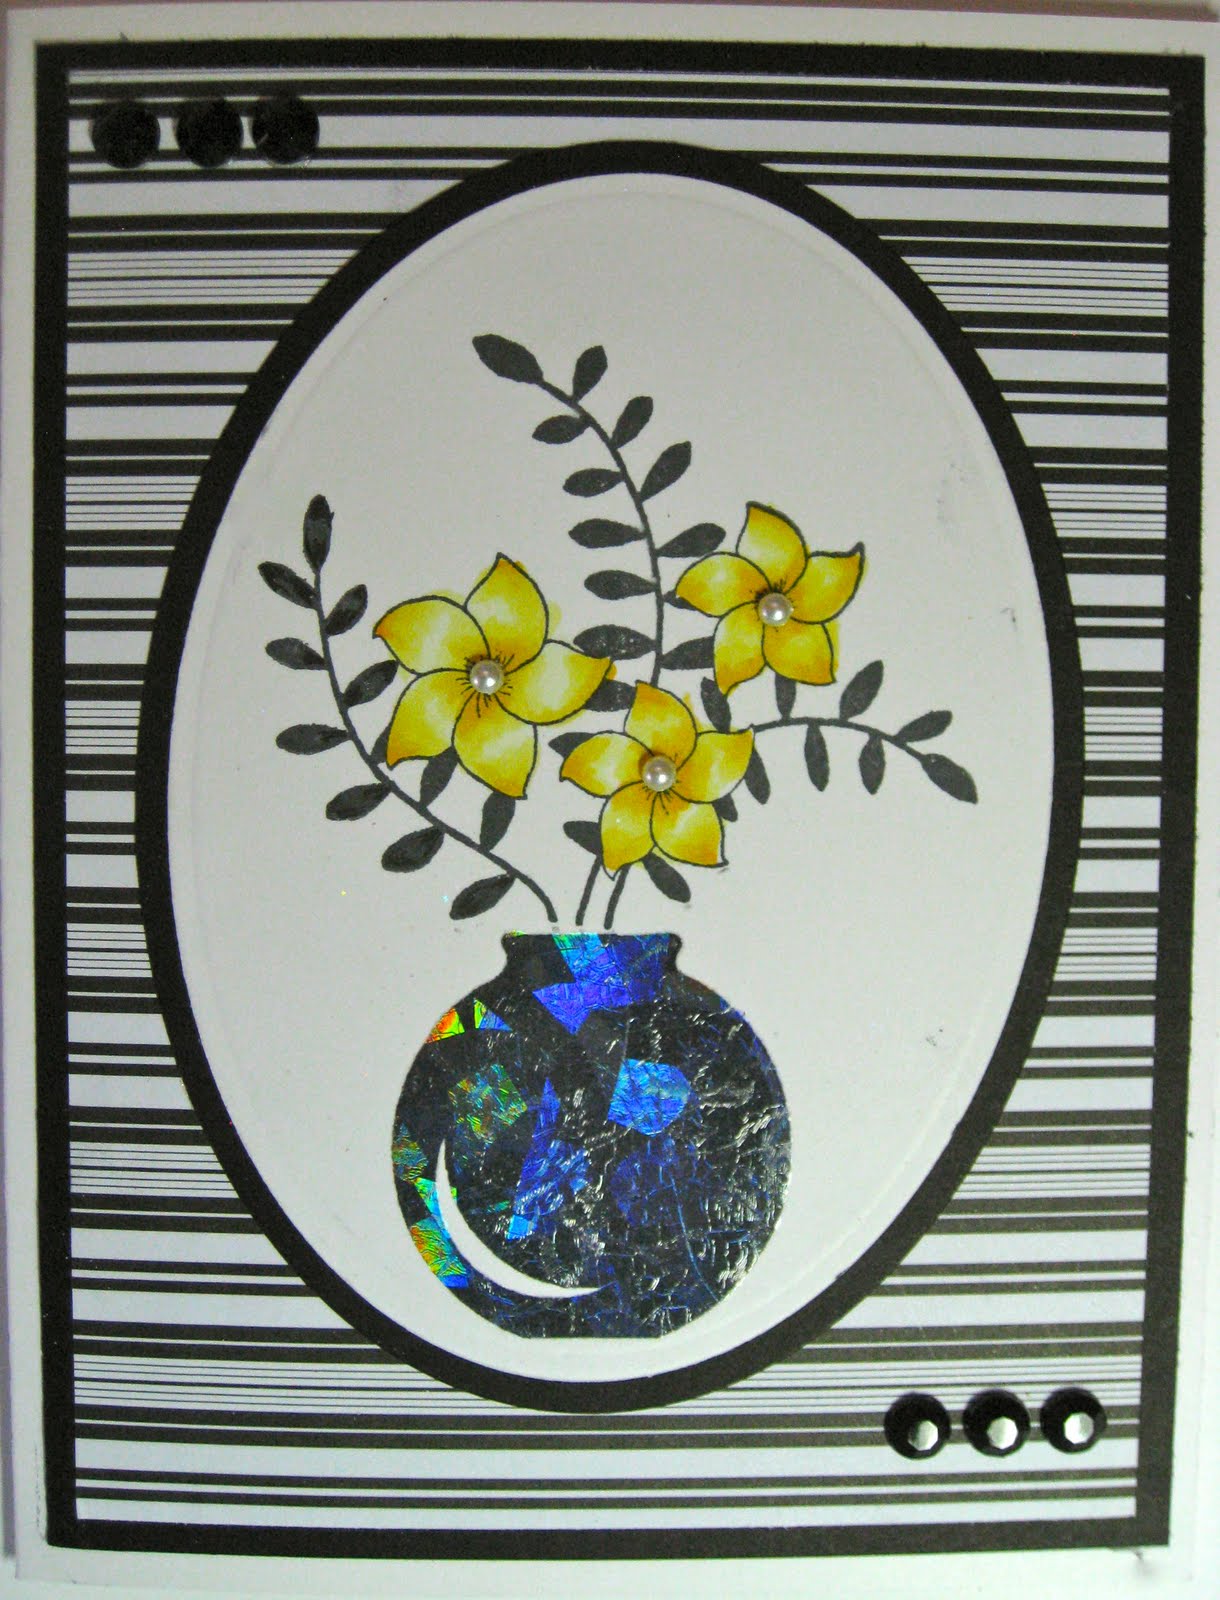
A Holographic Effect


Hello everyone!   I wanted to post this card I made for Stamper's Quest  It was my turn to post a stamping related article on our  e-magazine.   I wanted to show how I created this card with a holographic foil.   You will find a detailed tutorial for my card  HERE.    Please take the time to stop by and see how fun it can be.... it is sure to get your creative juices going!  The possibilities are endless!

I created this for an e-magazine so I am only permuted to post the picture, rather than the tutorial on my personal blog... but you will find it at the link! :D

Hugs,
Marie

Monday, September 12, 2011

A Quiet Place


For a detailed tutorial on how I did this card and to see the original sketch challenge by the fabulous Regina check this link out on Stamper's Quest - Trail Map - Marie's View  Then check out the home page  and you will be able to view what some very creative talented people have done with this challenge!

I cannot post my card details on this blog since I did it for the on-line magazine, Stamper's Quest .   It is a free on-line magazine that has new postings every week!   Features are posted at the first of the month and sketches are posted on the 10th.  Detailed tutorials  on the post are posted on the 11th and 12th.   The Watering Hole is a weekly post that has great ideas - all related to stamping in one form or another.   The best news....  the price is right... it is free to the crafting world.  Stamper's Quest  is a group of artists that want to share ideas and projects... so check it out!

I will also have a post on the Watering Hole section of Stamper's Quest   today or tomorrow.  It will feature a fun stamping activity with Stampee Holographic foil!   I can hardly wait to share it with you!

Thank you for stopping by.   Don't forget to check out my previous post and consider joining in the Color Me Creative challenge featuring fall colors or a halloween!

Hugs,
Marie

Sunday, September 11, 2011

A Little Wizard


Color Me Creative Challenge has a new challenge to get your creative juices going.  The Stamp Fairy generously provided digital images for our Design Team members this month.  The  images are just wonderful and we enjoyed creating cards for you that I hope you will find inspiring.   I selected a cute little image called "Tommy Wizard".  The theme for this challenge is  fall or halloween.  The Stamp Fairy will be one of our sponsors this month.   And drum roll........  A random winner will receive a:

a $15 Gift Certificate to spend at The Stamp Fairy
and 
1 Pack of Cryogen Cardstock

In addition,  each month every CMC Challenge Entry will be entered into a monthly random drawing.  That winner will win a $50 Gift Certificate to Oozak.com!!!


Techniques:
Copic Alcohol markers
Tip to Tip Inking
On paper Inking
Stampee Foil Embossing

Finished Card Size: 5.5” X 4.25”

Supplies:
Stamp:
Tommy Wizard digital image (The Stamp Fairy)


Paper:
Pure Luxury White Cardstock (GKD)
Pure Luxury Chocolate Kiss Cardstock (GKD)
Indian Summer Designer Paper (Basic Grey)
Cryogen (Curious Metallic)

Ink:
Copic Alcohol Ink (Too, Inc.)
Memento Potter’s Clay (Tsukineko)

Other:
Computer, printer and software to edit picture size
Paper trimmer (Fiskus)
Scor-Buddy (Scor-Pal)
ATG Adhesive (Scotch)
Cuttlebug and plates  (Provo Craft)
Nestabilities Deckled Rectangle die (Spellbinders)
Nestabilities Rectangle (Spellbinders)
Embossing tan pad (Spellbinders)
Iron or laminator
Jumbo Sponge Daubers (Tsukineko)

Embellishments:
Stampee Holographic Foil (Stampee)
Stuck on You Powder (Stampee)
Ribbon: Brown
Ribbon: Green
Green Rhinestones

Measurements:
Cut  a 8.5  x 11 in.  cardstock in landscape position.   This will produce one 4.25 x 5.5 in. pieces.  You will only use one piece of cardstock.
Base Layer: 4 x 5.25 in.
Designer paper: 3.6 x 4.in. (Cut in strips to be evenly spaced on base layer).
Focal image: Scrap paper
Focal layer: Scrap paper


Copics:  Cauldron: YR24, YR23, Y15, Y11, Y00  Stamp potion with Black Soot Ranger Distress Ink. It stays wet longer. Sprinkle "Stuck on You powder and shake excess powder off.  Heat emboss.  Apply Stampee foil over the top of the potion.  Remove foil and place image in a paper sandwich and iron on both sides or run through a laminator.   peal foil off image and PRESTO!  You have a really cool holographic page!


Hat, cape and shoes:  B35, E33, E31, E000


Skin Tones:  E000, E00, E02, R20

Stars and hat band: B04, B00, B000
Hair:  C7, C5, C3, C1, C00


Cut focal image with a rectangle Nestabilties die, flip image over, apply a tan mat and emboss image using an A plate, B plate, image, tan mat and B plate.  This step will make a very nice  embossed edge to your focal image.  Sponge Memento Potter's Clay  to left upper corner and right bottom corner of focal image.  Cute a focal image mat using a Deckled Rectangle Nestabilities die.  Color the grass using G28, YG63 and G40 Copic Markers.  


Cut the top card layer in squares and position over your base layer of Chocolate Kiss.  Be sure to allow your Base layer to show through around each square.  I had some extra space  in the middle so I applied a brown ribbon with a layer of green ribbon. Layer your base layer to your  card base and apply your  top layer and focal image.  Apply  green embellishments.  

I hope you enjoyed this fun little wizard card!   Thank you for stoping by and come back soon,  I will post a  picture of a Stampscape image in a couple days.  The link will send you to a detailed tutorial for my Stampscape card!

Hugs, Marie

Friday, September 2, 2011

Number 1 Bud!


It is time for the Stamper's Quest September Feature!  The quest was to create a card with numbers.    This is my card and I have posted a  step by step detailed tutorial!  Stop by and check out the tutorial  HERE

Stamper's Quest is a free on-line magazine filled with wonderful tutorials by some very talented artists.  Check out their wonderful cards from the links below.  
Thank you for stopping by!   come back soon!
Hugs,
Marie

Wednesday, August 24, 2011

A Magical World!


It is time for Color Me Creative Copic Challenge!   Pull out those Copic Markers and create a "winged" image!   Our wonderful sponsor is Make It Crafty   In addition, one random winner will be selected  at the end of the month  to win a $50.00 gift certificate from OOZAK  Now, who wouldn't want to win one of those wonderful gifts!  Get those Copic markers out and let's see some magic!

And now for my Color Me Creative Design  Team card....  Remember those times when our world was full of magic and wonder?   I think  it is fun to revisit those moments.  I hope this card will help inspire such a trip down memory lane!


Click image to  enlarge

Finished Card Size: 5.5” X 4.25”


Supplies:
Stamps:
  • Whimsical Log digital image (Make it Crafty)
  • Vixie Digital Image (Make it Crafty)


Paper:
  • Pure Luxury White cardstock (GKD)
  • Pure Luxury Fresh Asparagus cardstock (GKD)
  • Cryogen cardstock  for focal image (Curious Metallic)
  • Boysenberry Delight (Bazzill Basics)
  • Designer Paper (Martha Stewart)


Ink:
  • Copic Alcohol Markers (Too, Inc.)
  • Memento grape Jelly (Tsukineko)
  • Memento  New Sprout (Tsukineko)
  • Memento  Summer Sky  (Tsukineko)
  • Memento  Dandelion  (Tsukineko)
  • Memento  Paris Dusk  (Tsukineko)

 Other:
  • Computer, printer and software to edit picture size
  • Paper trimmer
  • Scor-Buddy (Scor-Pal)
  • Adhesive
  • Cuttlebug (Provo Craft)
  • Nestabilities Petite Small/Large Oval die (Spellbinders)
  • Jumbo Sponge Daubers (Tsukineko)
  • Doohickeys Die (Magnolia)
  • Mini Roses (Stamping Scrapping)
  • Ice Stickles (Ranger, Inc.)
  • Glitter Ritz


Measurements:
Card Base 5.5 in. X 8.5 in.
Score and fold  at  4.25 in.  (This makes card for a 2A envelope)
Card Base Layer  4 in. X 5.25 in.
Focal  Base Layer  3.25  in. X 4.25 in


     Log: E59, E57, E55, E53, E50 


Mushroom: BV25, BV23, BV20, BV000
 Grass G28, G40, YG 63
  Flower:  RV000, RV00,  RV66, RV69 Colorless Blender


2.     
    Wings:  G29, G40, RV000, RV00, Colorless Blender
 Skin E000, E00, E02, R20
 Dress: RV000, RV00, RV02, RV04
Hair:  E40, E42, E44, E47

The image was cut with Nestabilities Petite  Small and Large Oval Die and mounted.   I used a Magnolia Doohickey Die for the flourishes and mini roses by Stamping Scrapping. I applied some lavender Glitter Ritz for the fairy dust.   You have to have the magic!!! LOL!

Tip of the Day:  Did you know you can add a transparent holographic look to your images?   I will write a detailed  tutorial on Stamper's Quest  for the weekly Watering Hole where you will find wonderful weekly stamping tutorials by a selected  Artistic  Guide!  It is a free online magazine where you will find many stamping techniques and many sources of inspiration.  I will make sure to post a link for you on my blog so you can view the tutorial.  Look at the card below and check out the wings very closely...   It is so much fun.... I hope you like it!  

Click image to enlarge

This is another beautiful winged image from Make It Crafty   The image is called Alyssa Elven Princess.  Isn't she just beautiful?   

I hope you enjoyed these cards and please check back soon and spend some time!

Hugs,
Marie